Jumping into my Holiday Wardrobe

I’ve been after a good jumpsuit for a while, and made one last year from a German magazine that Chris gave me.  I liked it a lot, but it needed more adjustments to be perfect.  I even bought more fabric to make another, but the summer disappeared on me and I thougth I’d wait.  I then had an idea to make a pattern from the top portion of the Sew House Seven Tea Dress and a wide leg trouser pattern (more than likely from a Burda pattern) and see if I could make something work.  But other things landed on my sewing table and I hadn’t got round to more than just think of the idea.  And then Tara from Paper Theory posted her progress on making a jumpsuit pattern available.  I thought I’d just wait for that, given how good her first foray looked last summer when she drafted one for herself.

blue zadie 1
Navy linen Zadie Jumpsuit by Paper Theory

The pattern was released a week and a half ago now, and I’ve made mine!!  Actually, if you look on Instagram there are some great examples of the #ZadieJumpsuit to be seen.  Lots of different fabric types, pattern or plain, and on lots of different people.  I started by tracing the sizes 14-18.  I’ve had a bit of a change in measurements lately, and can start sizing down! (yippee)  Checking the finished measurements against my current measurements, and knowing how much ease I can get away with, made me start the toile with the size 16, with no adjustments.  I already knew I’d need an FBA, just not necessarily in width.  Making the toile means I get a proper idea of how much length I need to add to the bust depth.  I also thought I might need to size down in the legs, as they’ve been getting skinnier!  The other alteration I thought I’d need would be to shorten the legs – but by how much?

blue zadie 2
Can you see my whiter than white ankles in this shot? No? Need to shorten the trousers then!

I made the toile in an old duvet cover from the charity shop, and it ran up really quickly.  The instructions are really clear and easy to follow, with diagrams if you need them.  Once on, I knew I’d need that extra length in the bust depth!  Standing up straight, I marked the bust point with a marker pen, then I pulled down the front so the waist was actually on my waist and then marked the bust point again.  There was 3cm between the two points.  Voila!  Extra required bust depth!  The crotch depth was also low, like MC Hammer low! 😀  So I pinned up 4cm and it felt much more comfortable.  By doing this, I improved the look of the length, the trousers looked like they finished in the right place, so no chopping of leg length! Woohoo…

blue zadie 9

So, back to the paper pattern, I drew a line perpendicular to the grain line on the bodice front that lined up with the lower marking of my bust point.  Then I cut along that line, stuck the bottom bodice piece onto a piece of paper, extended the grainline, drew a line parallel to the cut line 3cm away and taped the upper bodice piece to that line, lining up the grainline.  Then I marked a dart at the side seam, the point of which is 5cm short of the bust point.  Then I trued up the front line, crossing my fingers that I’d got the curve right!  I used the lengthen/shorten lines on the trouser pattern to shorten the crotch depth.  I also decided that when cutting I’d move the shoulder line to the 18 on the front, giving me another 0.75cm of length in the front.  Maybe I needed it, maybe not!  Time will tell once I’m actually wearing the jumpsuit on a regular basis.

blue zadie 5
Boob wings in all their glory in this photo.

The nature of the fabric is also showing up one tiny flaw.  I do need to add some width to the bodice front.  Because of the cut of the bodice and the kimono-like dropped shoulder, I have little “boob wings”.  There is a triangular section of fabric running from the bust to where the armhole would be.  So I need to fix that before making another.  It didn’t show up so badly in the soft cotton duvet cover toile, so I thought I’d get away with it…

blue zadie 3

My fabric is a 3m length of 140cm wide navy Irish linen, 137gsm.  It has a crisp handle, but is lightweight and hangs beautifully.  It’s been in the stash for a while, and I’d fogotten it was as crisp as it was, but I wasn’t going to buy any more fabric just yet.  It will soften with washing ( eventually) but will never quite loose that crispness.  The colour though, is great, rich and with lustre.

The cutting layout has you open the fabric to a single layer, right side up, and cut each piece individually.  This is because the designer is looking at the best way to cut the pieces with the least amount of wasted fabric, which, with the size and shape of the pattern pieces, is high.  So leave plenty of time to do the cutting out!!  And follow the diagram, or you’ll be caught short.  Seriously, I recon it took as long to cut the pattern as it did to sew the toile!!  However, I only had small bits of linen leftover, so it was the most efficient way to cut.

colage blue zadie details
Bias binding on the front, with extra stitching for the ties. Insides are all overlocked.

The pattern itself is easy to put together.  You have the option of making it “sleeveless” which really means a short, dropped shoulder sleeve, or adding the sleeve, which gives you long sleeves.  This means you can make this jumpsuit for cold weather!  I quite  fancy making a wool suiting version and wearing a poloneck like the Tessuti Monroe underneath.  The front of the bodice is bound with self bias binding, but you can make a bit of a statement if you go for a contrast colour or a different pattern.  The bodice is staystitched before the binding goes on, so there’s no chance of stretching the front.  The only thing I did differently was to overlock all the pieces before I started sewing, instead of neatening as I sewed.

collage blue zadie

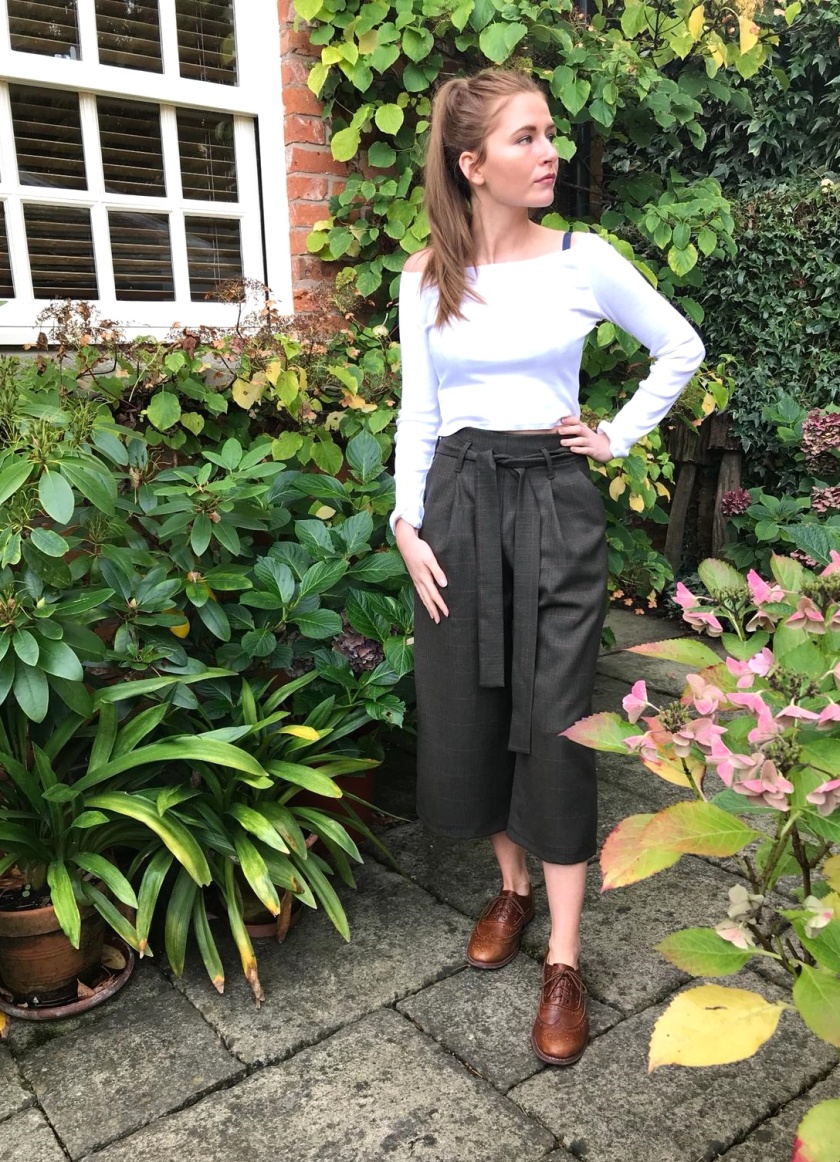
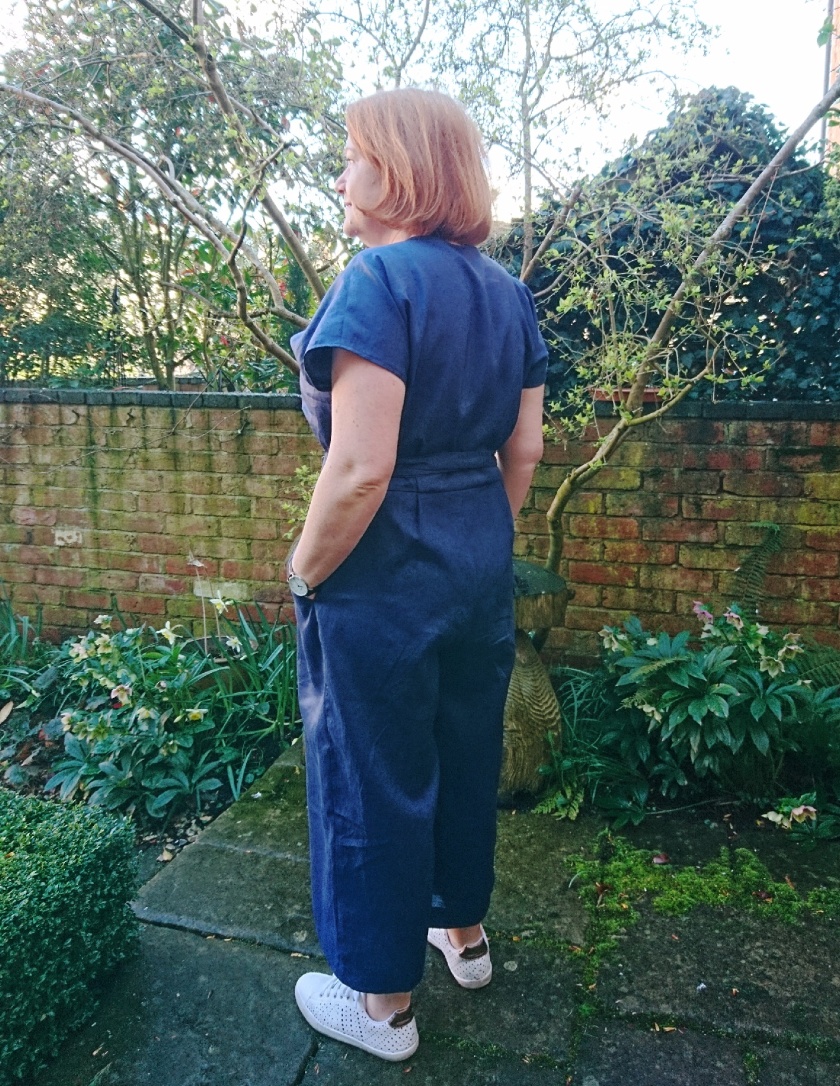
I really love, love, love this finished project.  It’s good to wear, shows no boobage when bending over (a critical aspect of any cross-over top) and stays put when moving about.  I double checked that one by doing a crazy lady dance in my sewing room.  In hindsight, I could probably easily loose another 2cm in the crotch depth and still have room to sit without squeaking.  It is a very forgiving fit!  The choice of size 16 was perfect, and while I could size down to a 14 for the width of the legs, this is a wide leg jumpsuit in a lightweight fabric, so no harm done.   I will also be removing about 3cm in the leg length.  Looking at these photos more shows that they are a tad long on me, you cannot see enough of that overwhelmingly white ankle, just about the same colour as my trainers!

blue zadie 4

I’m heading home – back to South Africa – for three weeks over the Easter period, and this is going to be the very first item that goes into my suitcase!  Along with a large bottle of fake tan…  I hadn’t deliberately decided this time to make anything for the trip, so this is a bonus – mostly because I didn’t think the pattern would be available until the summer.  So, would I recommend it?  In short – yes.  I’ve seen it made by tall slim people, and by shorter, fuller figured people, and it looks good both ways.  I’m not the tallest person on the block at 1.65cm, but the proportions seem to work.  The fit is relaxed and loose, but you don’t feel like the saggy baggy elephant.  I have a feeling this will work on pretty much all body types.

blue zadie 11

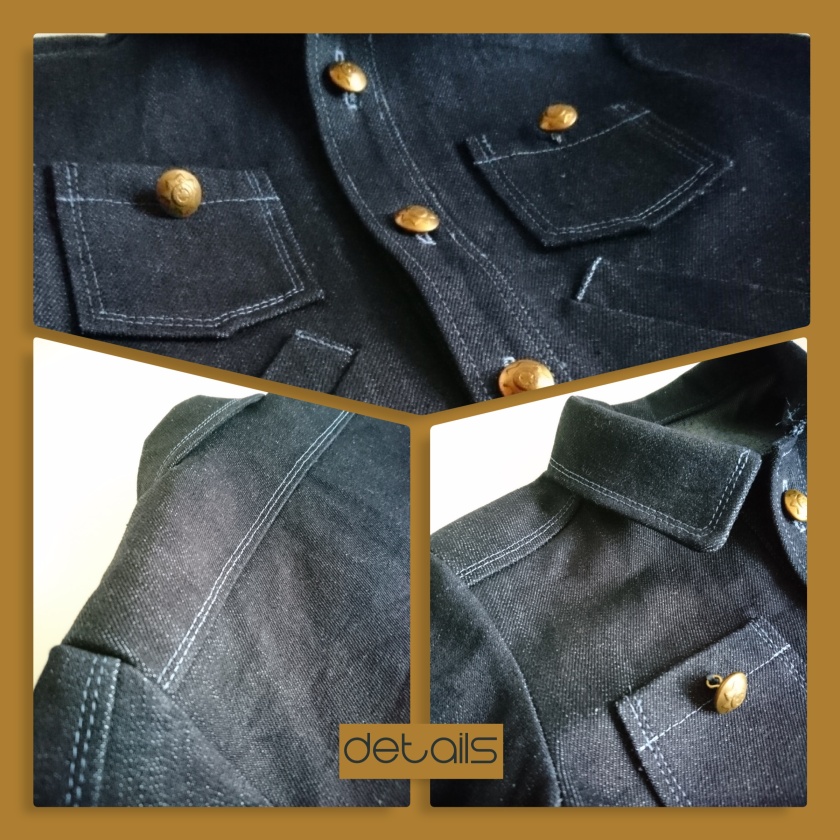
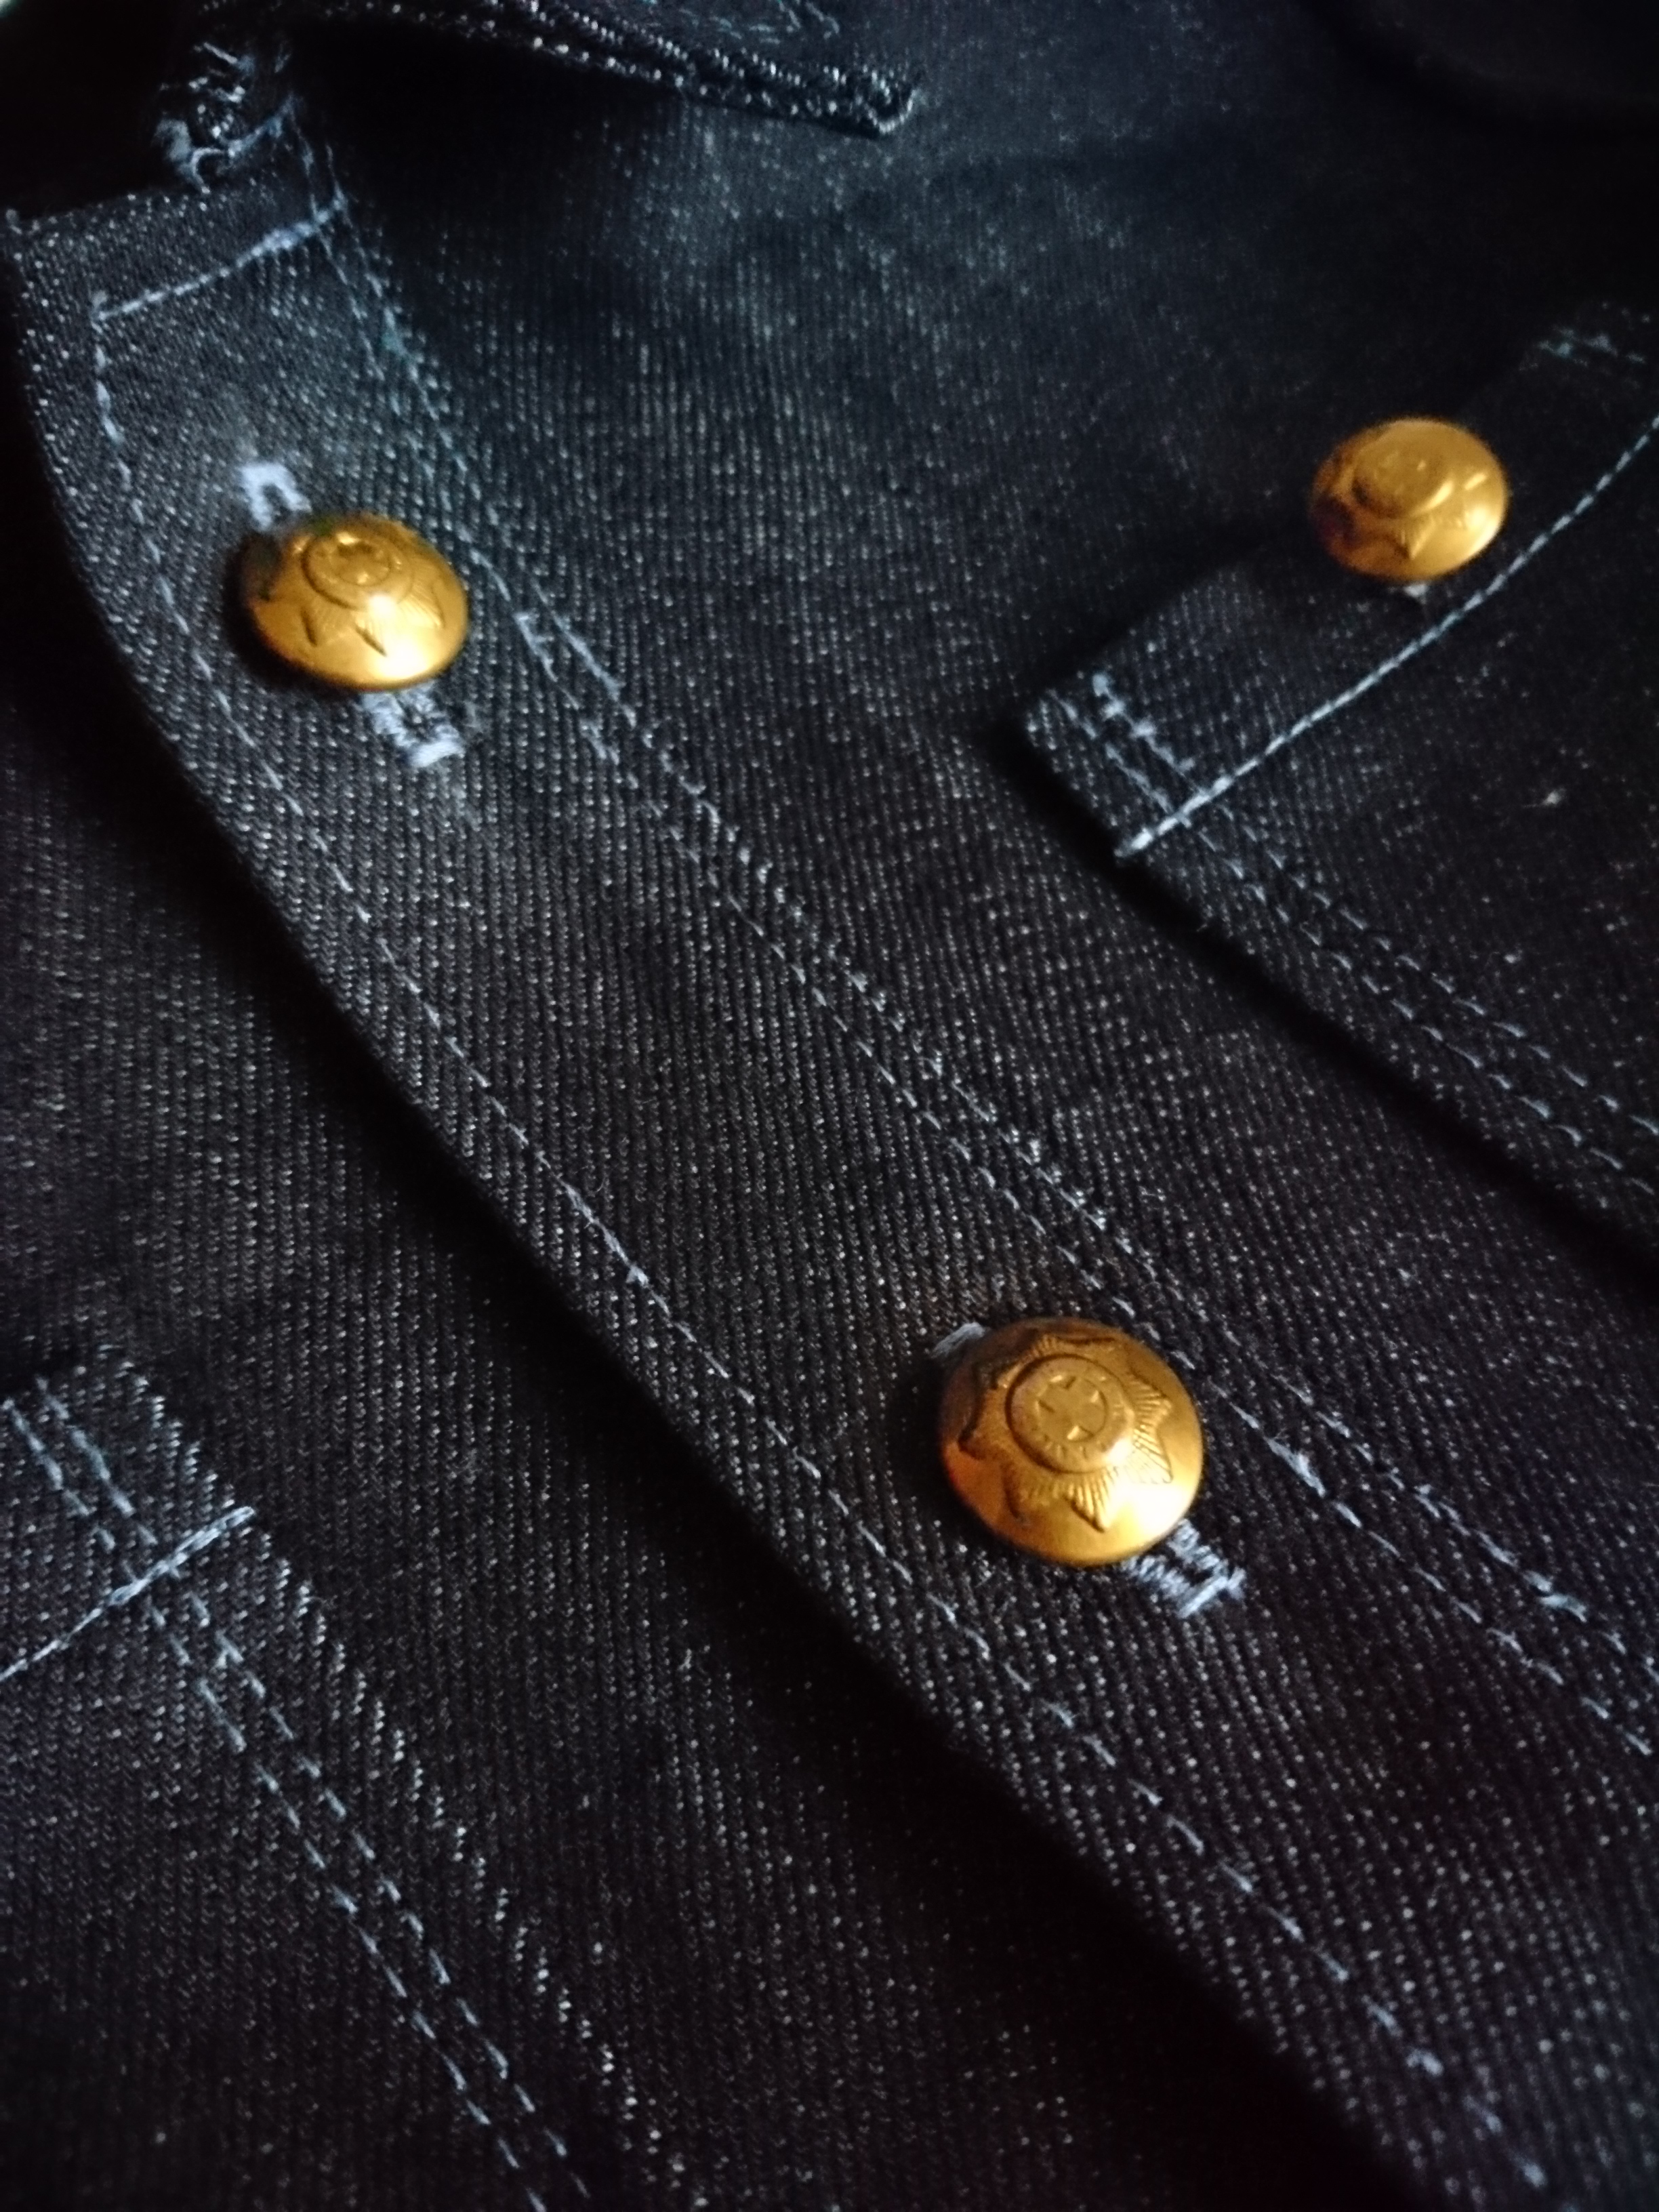
Now, will I make another?  Heck yeah!  I’ve just remembered a black 3m length herringbone linen that’s in the stash, bought 2-3 years ago when I first thought I’d like to try the jumpsuit trend.  Might even do the sleeves with that fabric, it has more body than the navy I’ve just used!  But first, I have a couple of Kabuki Tees I want to make, and some grey jersey that wants to be a Stellan tee, and make my first ever Style Arc trouser pattern, and I need to make two things for Daughter No2 that I toiled the week before last, and…..  BIBS!  I want to make a pair of hazel linen Burnside bibs to take with me!  Oh boy.  There is still the allotment and digging in of muck and starting of dahlias and sowing of seeds to do too.  Oh help.

Do you wear culottes in the Winter?


I have two pairs of cropped, wide legged trousers in my winter wardrobe, made last year and worn loads last winter.  I also plan to make a pair or two of the Peppermint Wide Leg pants, for myself.  From my deep stash, in the winter fabrics boxes, I dug out a lovely windowpane wool that I had bought ages ago from Fred Winter in Stratford on Avon.  It had been used to make a pair of trousers for Daughter No 1 back in 2013 & I stashed the leftovers for a future project – because past-me bought enough of the lovely stuff for more than just one pair of trousers…


culottes 1
Culottes 104 Burdastye February 2017


culottes 6
All those red lines looking good!

I waved this piece in front of Daughter No1’s eyes recently when she said she wanted a pair of trousers that would sit on or just above her natural waist, and be loose fitting over her tummy.  I figured there’d be enough there to make a pair of the culottes from last February’s Burda, which I have used to make 3 pairs for her already!  So she knows the fit, etc.  It didn’t take much convincing, and I knew they’d look fabulous!  (And machine washable!)

culottes 4
Good fit in the back


culottes 5

I made sure the red lines of the windowpane check were in the right places on the pattern pieces, transfering the marks onto the paper pattern.  I cut the 34 and only took them in a tiny little bit (1.5cm) in the centre back once they were fitted, essentially making a dart in that back seam.  I shortened the pattern in the crotch depth by 1cm, the upper thigh area by 1.5cm and between the knee and the hem another 1.5cm.  I have also moved the zip from the centre front to the side seam, which she prefers.  All the culottes I have made from this pattern for her have a side zip.  But, this is the first time I’ve made the pants with the belt loops and tie for her.  And she likes it!

culottes 3
Spotty lining in the pockets

These are going to look fabulous as part of her winter wardrobe.  The photos were taken on one of her visits home, so she only has limited clothing to wear with them here.   These pants will look great with boots, smart high heels and of course, these handmade brogues she bought on her travels in Vietnam.  I am making her a coat at the moment in a pink/copper colour that will look amazing with the tones in these pants, so whole outfits are emerging!

culottes 2

Mini James Dean

I’ve got a large plastic tub full of pieces of fabric left over from all sorts of projects, all big enough for something, but not something for me.  I’m always loathe to throw these bits out, or even to give them to the local school for the kids, because I know I can do something useful with them – eventually…

denim jacket 8

So this project is me using up one piece of that stored fabric.  You’ll remember the Morgan Jeans I made last year, with a yummy, dark denim from Croft Mill Fabrics.  There was a piece left over that wasn’t much good for anything except maybe a tote bag, and that’s what I had in mind for it for ages.  But, going through the April issues of Burda looking for projects to make this month, I came across a cute kid’s denim jacket #134 04/2010.  A friend of mine has a little boy who’s 5 this year – it would be perfect for him! (and I thought it could be kept for his little sister to wear when she’s big enough)

denim jacket 1
Kid’s Denim Jacket, Burda 134 April 2010

So I traced out the 6 year old size (110), and the pieces fit perfectly on what was left of my denim.  Go! Go! GO!  It was tricky to get the pins in, I’d forgotten that, and stiff to cut – oh dear, but I ignored the warning bells…

collage denim jacket
Lots of topstitching – I didn’t even try topstitch thread!

All in all, it’s a simple pattern to assemble, the instructions, while basic, are clear.  The only problem I had with the whole thing is the size of those little pattern pieces and the stiffness of the fabric!  I don’t mind admitting I swore a fair bit.  And I have made a vow, never make a tiny denim jacket with fabric that stiff ever, ever again!!!  It was really fiddly to turn the cuffs, the collar nearly killed my fingers (they got in the way of my pounding).  The only good thing was that my old Bernina sailed through all those layers of thick denim with consumate ease.

denim jacket 9

Boy am I glad I’m only making one for two kids!  I think it would be lovely in a softer twill too, even a nice linen/cotton blend.  In order to reduce bulk around the welt pocket area, and to make it easier for my machine to get through layers, I cut the pocket pieces from another bit of left over fabric, black and white large check gingham cotton.  I deliberately did not choose something “boy-like” so that it could be handed down and worn again.  I like the idea of unizex clothing when it comes to items like jackets and coats.  Makes sense, money wise.  I remember as a kid, my mum bought me boys jeans that my brother got when I outgrew them, and my sister got them after that!  If there weren’t holes in them, that is.

denim jacket 4
Gingham check cotton for the pocket bags

I didn’t want traditional jeans buttons, they can sometimes be stiff to use, and with this fabric it needed to be easier for little fingers, so I raided my vintage button box and dug out some military uniform buttons I’d got from the charity shop a year or so ago.  The small ones were perfect!  I’m really happy with how they look on the front of this jacket.

denim jacket 3.JPG

My long-list for April’s Burda Challenge sewing was fairly long, and I decided against just chopping it down randomly, rather by seeing what fabric I had and going that way.  On that list were frequent referrences to “kid’s clothes” because the size range is right for my friend’s kids.  This is the first of those projects to be made and there’ll be more!  I need to get that fabric box emptied, and it’s nice to make clothes for kids, they’re usually much quicker and simpler than adult’s clothing.

Now I’m off to continue tracing the long list of patterns daughter no 2 would like made up for the summer – this summer! By the way, if you’d like to see her wishlist…

Follow the link to see the whole post, this just shows a part of it!  🙂


Japanese Inspiration

I love the way the internet and sewcial media can influence and inspire us (usually solitary) sewists.  I’ve been following Jing – @jingandtonic, on Instagram for a while now, and I always like what she’s wearing.  I like the shapes, the colours and her choice of fabrics.  She uses a lot of Japanese sewing books to create her handmade wardrobe, and it’s a good look.  The more I saw, the more I was inspired to translate a bit of that into my wardrobe.

https://www.instagram.com/p/BgDWl8ChWBK/?taken-by=jingandtonic

Now let’s face it, I am not a 30-something ethnic Chinese lady, so there’s no way the Japanese sizes will ever fit me, and some of those shapes will never suit either – but it’s not about copying.  So, inspired by all that, I ordered Clean and Natural on Etsy, and Kana’s Standard I and II on Amazon.  I also looked through my copy of She Wears the Pants with new eyes.  There are definitely shapes in that book I can use.

While I wait for all the books to arrive, I started a little something.  I was digging in the stash for something that I ended up not finding (think it’s been used or given away already) and “re-found” a certain 2m length of an almost gingham weave linen blend in shades of teal, grey and dark damson.  It came from Croft Mill years ago!  It was one of those pieces I loved, but was unsure about using – not wanting to end up looking like a cowboy wannabe.  But my brain was still in Japanese structural shape mode and the lightbulb went on!

collage gingham.jpg

I thought it woud be fabulous made in the pattern I used for the windowpane top in the January Burda challenge.   A quick check that the pattern actually fitted on the width of the fabric later and I was convinced.  This would work!  I quickly abandoned the March burda challenge projects mid-sew and made the top!  I made it exactly the same as the first top, all the adustments had worked out perfectly so I had no reason to faff with the pattern.

gingham2

gingham5
Burda top 121 January 2012

I love the result!  The fabric has enough body that it doesn’t drape or hang, but is not so stiff that it feels like I’m wearing a box!  And I love it with my Birkin Flares!!!  It’s going to be fabulous to wear in the spring (when it finally arrives) and on those rainy, slightly chilly summer days.  There really is nothing bad I can say about it.

gingham3

gingham8

For someone who does not wear a lot of pattern, especially a large pattern, this top is great!  I’m perfectly comfortable in it, and don’t feel like it’s wearing me.  Now I want to make some more slim-fitting pants/trousers for the summer to wear with it, because I don’t think it’ll work with my usual wide leg trousers.  There will be just too much width!  I think with boxy shapes, it’s definitely about proportion.

gingham6
Front detail

So, what will I make next with this new look?  Not sure.  I will be pattern cutting anything that takes my fancy from the Japanese books.  I need the books to see the shapes and proportions they use, so my patterns can be sort of correct.  I definitely will be making some of the tops, I love loose fitting stuff in the summer, I get way too hot in clingy stuff.  I like the air to circulate!!

But in the mean time, I have March Burda patterns to make!!  How is everyone getting on with the Burdachallenge2018?  And the #sewyourstash challenge? And anything else going on in the sewcial sewing world…

The Distracted Seamstress

DSC_0283

I’ve been dusting off a long lost and unused “skill” – knitting.  As touched on in the last post, I persuaded a friend to help me to knit again and she taught me how to make a “simple” cable knit fingerless mitten pattern.

I won’t go into massive detail, but I made three pairs of that pattern, and now I’m trying my hand at a cable knit beanie/hat.  That’s going slower, much slower.  Because I got distracted again!  I dug out my crochet stuff to make (wait for it)…. dishcloths!  WTF?? I hear you ask.  Have I lost my mind? Well – no…

This year I’ve been thinking more and more of the environmental impact we all have.  This world has limited resources and I want to try to do my bit to be more sustainable.  This means not buying single-use plastic, recycling more than I did in the past and being more careful with what I throw away.  We have become such a throwaway society, because it’s become cheap, easy and convenient for us to do so.  We are encouraged to do it by the retailers.

So far this year I have ditched supermarket milk in plastic bottles for glass bottles I bought myself and take to the local farmer/dairy twice a week for refilling, ditched cling film & bought beeswax wraps (going to make my own soon!) and swapped supermarket plastic wrapped veg for the local grocers and farm shops.  The veg is cheaper and I only need to buy what I need for that week, saving pennies and food waste.  My old shampoo and conditioner in plastic bottles have been swapped for bars from Lush, and shower gel swapped for good old fashioned soap in cardboard  boxes.

I’d love to make my own soap and bath salts, that’ll be on the to-do list along with the beeswax wraps.  When my toothbrush needs to be replaced, it’ll be with a bamboo one, and I now carry a stainless steel straw in my handbag.  Other things I can do easily are to be found in my stash.  I made two granny square afgan sampler throws for the girls when they went off to university, and while I managed to sell some of the cotton left over from those projects, I still had a bag of about a dozen balls of Rowan Cotton Glace lying around.

collage crochet

I saw somewhere that someone had made some facecloths with crochet using cotton yarn.  So I thought – why not?? I started with just making up a couple of patterns on some actual dishcloth cotton from Deramores.  I’m sure you can get it elsewhere too.  I was impressed with how these tests worked out, I found the ridges in the crochet worked really well to scrub off those bits that you’d usually need a scourer for.  Any stubborn bits get the baking soda treatment, and voila, clean pots and pans!  And when they get dirty they can go in the washing machine!

I bought this book on Amazon, and am slowly working my way through all the designs.  Some are really quick, others you need to remember to count.  I prefer a lighter, lacier design for washing dishes, to be honest, and not too big a cloth either.  It’s not easy to get a large, firmly crocheted cloth into a glass.  But for drying they’re good, and of course, they don’t have to be used for dishes!  Think of the pretty facecloths you can have in the bathroom!  I’ll be using up my stash of left over coloured cotton nice and quick now, and have something useful and pretty in exchange.

DSC_0349

Next in my sights was to update my shopping bags.  I haven’t used plastic bags from the shops in ages, and the “long-life” hessian bags from Tesco have definitely seen far better days!  Some have lost their plastic lining (not a bad thing), some are decidedly holey.  So I’ll be using scraps of left-over denim from my jeans making to patch the holes, visible mending style.  The bags with dodgy lining will have those replaced with linings from fabric in the scrap boxes.  I am happy to patch stuff together, so look out for my attempts at patchwork!

Speaking of which – I also wanted to make new totes for popping into our local town for bits and bobs.  It’s not far and I walk in regularly.  I have been collecting the shirts that Mr Not Compulsive has been earmarking for the fabric recycling bin at the recycling centre.  I actually can’t see why we need to send these things all the way to India for them to shred and turn into dog blankets.  I can see a very good use right here!

I’d seen a pretty, simple patchwork pattern on Wisecraft.  I thought this would be perfect for left over fabric scraps and these shirts!  I cut the shirts up along the seam lines, removing the collars, cuffs and yokes. Then I cut 25cm squares, including button stands, sleeve plackets and some seam details.  I figured it would be fun to actually show what the fabric had been before it was a bag!  I sewed 9 squares together, cut that in half horizontally and vertically, rearranged the resulting squares and sewed them back together.  I did this kinda randomly, kinda looking at the colours, but totally not following the rules of the patchwork!

But I thought it looked too small to cut up for one bag, so I sewed up the rest and put them all together to cut up.  Of course, once I’d done that, I didn’t want to cut it up!  Cue new project!  I thought I’d turn this patchwork square into a throw for using in the garden in the summer, it just needed a back!  The local charity shops supplied me with a single duvet in apricot which was the perfect width, just needed to be shortened.

By this time I’m thinking I like the kanthas I brought back from South Africa (see picture above), I can do something similar with the throw…  So now I’m using up the remains of my embroidery thread making rows of running stitch down this rather large throw!  Thankfully it’s keeping me warm in this cold weather while I work!

There was one 9 square square left over after all that, so it got quartered and I decided to make a couple of smaller grocery bags with them.  I’d bought a piece of pale blue denim in someone elses’ destash that was just perfect to bulk out the cotton shirting fabrics.  I cut 4 squares of the denim, 35×35 cm, the same size as the shirt squares and pinned them together.  Then I cut 6 pieces 15x35cm to make the bottom and sides of the two bags. After attaching them all together, I measured the circumference of the top edge and cut a strip 94cm long and 8cm wide.  This would be the top edge, folded in half lengthways.

DSC_0359
I love seeing the shirt evidence!

Then I cut the handles.  There were two pieces the perfect length for holding a bag in your hands (not so long that the bag would touch the floor) or for putting on your shoulder, so I cut them 8cm wide.  Then I cut two more pieces 8cm wide, but longer.  from the selvage strips that had been cut off the top edge, I zigzagged two 12cm lengths together and sewed one of the with one end under a handle.  I wanted a loop that I could attach my house keys to.  They usually end up in the bottom of the bag, under the shopping.  That’s not terribly helpful when you get back home and need to dig under the spuds before you can get in out of the cold!

DSC_0358
The handy loop for my house keys. I like the raw-ness of the inside of the bags.

I sewed a pair of snaps onto the strip so now it’s easy to keep track of my keys.  I didn’t line these bags, the denim looks good and to neaten the inside I just used a nice bright orange thread and zigzagged everything.  then I used it for the topstitching too, just to tie everything together.  I’m really chuffed with my new shopping bags, can’t wait to use them!

collage shopping totes.jpg

And one last trick – I’d made some bags from coffee bean sacks a few years ago, and one had developed a nice big hole in the bottom seam.  No problem, using another strip of that pale blue denim, I simply sewed it onto the bottom of the coffee bag, using nice big zigzags.  Sorted!

DSC_0361
One fixed coffee sack tote.

Now to get back to hand stitching the rest of the running stitches on the throw – I’ve a feeling you’re going to want to see that too, before the summer.   Hopefully I’ve provided a little inspiration for using up your scrappy bits, and doing your bit for the planet we live on too.


February Burda Challenge

Heavens, has it been that long?  Two posts in one week at the beginning of the month, then radio (blog) silence!  Sorry guys, been too busy sewing – and knitting – and crocheting..  I’ve been distracted, basically.  I finally picked up and dusted off my ancient knitting knowledge and persuaded a friend to help me learn again.  So we started with a pair of cable knit fingerless mittens.  As you do!  And I’m hooked!  But that’s a post for another day!

Collage february challenge


So while I played around with knitting and crocheting, there wasn’t much sewing going on.  I had intended to try two of the blouse patterns from the February 2018 Burda, numbers 108 & 120.  After tracing the 44 and toiling, I added an FBA to 108 and decided to skip the elastic in the sleeve bands and level off the hem lengths.  The tie back blouse, 120 didn’t need an FBA, but was too long, so got shortened by 7cm.  Fabrics were to come from the stash, yes, there is still enough in there…

ellies 1
Burda top 108 02/2018

So after shaking myself and telling me to just get on with it, I finally started work on the two tops/blouses.  For the first project, I picked out a piece of Indian raw silk, hand dyed and blocked with resit.  I’d bought this fabric from a fellow student in my City & Guild days in about 2004/2005.  Yes, you read that right, not 2014.  She’d gone to India that year, as she’d done every year for ages, and brought back goodies for the rest of us to drool over and – buy!  But I never did find the perfect project to use it on, I’d not be getting more in a hurry!

ellies 2

After last month’s success with the spotty silk, I thought I might be onto something, and decided to use it for top 108.  The fabric was rather narrow, and the pattern of elephants runs parallel to the selvage print border, so that dictated the fabric be folded on the cross grain.  I used the selvage for the hem, no point cutting anything there just to turn it up.  I used French seams throughout to keep it all neat and tidy.

ellies 3

The neckline was a pain, on the toile it had stretched out and looked awful, so this time I knew to treat it with extra care.  The neck finish consists of a neckband with facing and a long strip gathered to fit the outer neckband.  I interfaced the outerband with some fine sheer polyester fusible, marked the halfway points and set about gathering the long strip which I also cut on the border.  I’d marked the centres and quarters there too, so gathered in between the points and pinned very carefully!  It seems to have done the trick as the band sits flat against the body and there’s no stretching out.

I did not insert the elastic in the sleevebands this time, I just don’t think the silk would like it very much, and I didn’t really need any more gathering.  I like the result, especially having made the front and back hems the same length.  I kept the little slits in the side seams, gives a little detail.  I think I’ll make another of these, possibly a viscose, but I think a fine linen for the summer would be yummy too.

feb 1
Burda top 120 02/2018

The second top for February is #120.  The toile fitted just fine without any bust adjustments, but it was way too  long for me, so I chopped 7cm off the length of the pattern pieces.  It also showed that the bias cut band for the neck finish neede to be stretched quite far to fit, so I needed to make sure I didn’t stretch out the neck while sewing the pleats in the front.  The instructions for the opening in the back for the tie are, I think, in the wrong order.  I did that bit before sewing the side seams in the final top.  It gets fiddly and there’s rather a lot of fabric you’re trying desperately not to stretch if you do it in their order.

feb 3

So the final top – I stretched that neckband to fit, just like they say, and made sure all the balance points lined up, and still managed to fluff it.  I must have stretched more in one direction than the other, or maybe the band wasn’t exactly on the bias.  But the band has twisted in the front.  Damn.  Well, I wasn’t going back, so now it’s a “design feature”.

feb 4

I like this top even with that open back!  With this week’s “beast from the East” Arctic/Siberian temperatures I will not be wearing it, but as soon as it warms up again, I think it will be in constant rotation.  The fabric is navy viscose from the stash, I think I bought it 2 years ago from Minerva Crafts, and there’s a bit left over that might be used for some sort of colour blocking with another “leftover” to make sure it’s all used up!

feb 2

So, February 2018 has been a good issue, I’d have made more if I had the fabric.  One problem with shopping your stash is that eventually you’re looking at pieces that have limited uses.  I also have two boxes of fabric I “can’t” really use.  That’s because they have been allocated to each of the daughters for clothes – when they decide what I’m making.

I wonder if they’d notice a few pieces going missing…


It’s February!

It seems I just can’t stop making knickers!  I’ve made another 4 pairs to add to the previous 7, making that 11 now.  They have gone to the daughters and a friend, and they love them.  I got a message from the friend after she got hers saying:  “I bloody love my pants!!”  Daughter no 2 has proclaimed them the best fitting pants ever – no vpl, no digging in.  They are a complete success!

IMG_20180201_133040_235
Pretty as a picture! Acacia Knickers from Megan Nielsen
IMG_20180201_123044_943
Floral edge knicker elastic, found by chance in my stash!

I found some pretty floral edge knicker elastic hidden in a different box, so used that on some blue viscose knickers.  I also dug out some bows and ribbon rosebuds.  I had intended to use some on all the pants, but forgot…  So it’s just these four that have the extra decoration, but they won’t be the only ones.  There’s more, pretty coloured elastic on the way to me, and I found a couple of tees I no longer wear to cut up!  I might be making these in dribs and drabs all year…

DSC_0143
I’ve enjoyed looking out coloured elastics and digging out lingerie decorative items for those finishing touches.

This weekend I made yet another Burda top for my mum.  It is her one and only favourite pattern, #143, March 2004.  Sewn Bristol had a destash on Instagram a couple of weeks ago and I snapped up just over a metre of each of the red and blue tropical cotton poplin print.  It’s got French seams, double turned hems and a bias trimmed neckline.  I’ll be running up the red version in the next few weeks too, and then I need to get them shipped safely to South Africa without any pilfering fingers going off with them.

img_20180203_212211_1551797469673.jpg

I also tried something new this week… I started knitting!!  I know, I’m just as shocked!  I found the wool in a charity shop, looked up suitable beginner patterns online, found a non-beginner one and went for it!  I remembered how to do the rib part but needed help with the pattern for the rest.  I joined a group of local knitters on Friday afternoon and soon was on my way.  I ripped out loads, almost dumping it in the bin.  But I stuck with it all Sunday and finally today finished it!  I made a hat! 🙂  It’s even wearable…

So in addition to another top for mum, and making more knickers than I could ever have thought possible, I need to decide on stuff for February’s instalment of the BurdaStyle Challenge 2018.  I have to admit that this month’s issue is jam packed with perfectly make-able patterns.  I’ve had a little browse through previous year’s February issues and this one still tops the numbers in options.  So I need to get on with it!!

Looking back at 2017

I kept much better records of my sewing adventures this year, so I thought I’d take a good look through them to see what truths lay beneath!  There are a few projects that were never blogged for many reasons, some that got scrapped and never even got to the WIP stage, and some I’ve sort of counted twice..  Those are the self drafted ones, the pattern and toile counted as one project, the actual garment (if it got made) was seperate.

I also thought it would be interesting to see just how much stash I got through, it certainly felt like I’d used quite a bit, until I look in the cupboard.  I also made a fair few fabric purchases, but after going through everything, I only have 6 pieces left that I bought and haven’t yet turned into fully functioning garments.  And that’s purely due to time!  So I’m calling success on the the “not growing the stash” goal this year!

So how did I really do?  Well, there were a total of 82 projects.  Two were scrapped, one because the fabric and pattern turned out to be incompatible & the other because the recipient told me too late that she didn’t like what I was making, fabric or pattern.  Hmpf.  Oh well, onwards and upwards!  A large majority of the projects were for yours truly, the other lucky recipients are my girls and my mum, with 10 projects going to “others”!

graph 1
Half of my sewing was for me!

Pattern usage has been heavily biased to the Burdastyle magazine patterns, not really a huge surprise!  The next most used brand is Named, purely because of the Talvikki Sweater.  The Toaster Sweater from Sew House 7 was also much used and I can see that continuing.

graph 2
Patterns Brands used, & how many I made!

Obviously the Burda patterns featured heavily, so they are amongst my most used, the cropped trousers from May are one, as are the culottes from the February issue.  Those Talvikki and Toaster Sweaters were very popular with the girls.

graph 3
Most used patterns

As you know, I love my trousers, don’t wear dresses and this year for the first time in ages, made myself a skirt!  So to see just how many of what I was making, I made a new graph!

graph 5
Tops, trousers and tees are my most commonly sewn items!

The dresses that show up didn’t even stay in-house, all four projects were for friends!  The PJ coloumn took off after I’d made all those pjs for Christmas, and Christmas had a hand in growing that sweater coloumn too.  All in all, I think it’s been a rather successful and productive year for me, sewing wise.  And look at what I did with my stash…

graph 4
Stashbusting!!!

Even though I bought a decent amount of fabric this year, nearly all of it has been sewn up!  I only have 6 pieces of fabric bought this year that I’ve not had time to use up, coating for Mr W’s winter coat, 3m of grey cashmere for a coat for myself, ponte for a sweater for daughter no2 and one for me, 3m of oilskin to make a Tosti for myself and 2m of wool for another pair of trousers – also for me!  I’m really chuffed that none of it has ended up in the stash proper.  It hasn’t gone anywhere near the cupboard!

So, plans for next year.  THIS YEAR!!  Well, I really want to get Mr W’s coat done, and one for me too.  I have a piece of camel cashmere in the stash that I thought would make a good Bamboo coat.  Shouldn’t take too long and will give me time to decide on what pattern to use for my grey cashmere.  Those projects I’d like to get on with pretty quickly, and also get those trousers and sweater made so there’s almost nothing left from last year’s purchases to put in the stash.

Here’s to another year of creating and sharing, and may my the stash be smaller at the end of it all!  Happy New Year, may 2018 be good to you!

Stashbusting Trousers

img_20171108_102953_3051754087513.jpg

There’s a lot of sewing to catch up on, so here goes.  Two years ago I made a purchase of two pieces of grey wool (amongst other things – of course) from Croft Mill Fabrics.  One of the pieces of wool is a suiting weight blend of viscose and mohair, and really wasn’t what I’d expected when it turned up!  I pictured something thicker and warmer – snuggly…  This was fine, had a sheen and was rather fluid.  So it went into the stash until I could come up with something.

Eventually, after making this pair of Burda trousers earlier in the year, I decided to reuse the pattern and finally make up the silver grey fabric.  Go stashbusting!  I opted for the longer length view and the mini turn ups, leaving off the welt pockets at the back.  I don’t use the ones on the other trousers at all, and it’s just annoying to have to iron the darn things flat each time.

I used the same fitting alterations as the last time, but didn’t shorten the pattern at all! There is no stretch in this fabric at all, and it’s shown that I probably need to make a chunky calf adjustment.  It wasn’t a problem with the last pair because of the stretch content.  Because the fabric is so thin and fine I decided to add a little something and raided my linings bag for something suitable to line the trousers.  I picked out a green viscose lining and used it to half line the fronts.

There are no contrast fabrics anywhere else, the waistband and pockets are all in the main fabric.  I’m really happy with the result, although I can see that they may not make it all the way through winter, being so thin.  But they’re surprisingly warm(-ish).  I love the mini turn-ups, and the finished length is perfect for wearing with heels or my silver brouges.  Definitely making another sometime.  I’ve worn them once a week since I made them, which is a good sign!

dsc_0056-012143689455.jpeg


dsc_0057-011315331009.jpeg

img_20171108_0938411955637116.jpg
Details
dsc_0060-01734665999.jpeg
Love these little cuffs!

dsc_0055-011512349611.jpeg

More catching up to come, although it won’t be stashbusting…


Roads Untravelled

And patterns unmade!  There’s one problem with buying Burda magazines every month for the last 20 years.  I have loads and loads and loads of patterns that I thought I’d make but have not got round to.  During Me Made May this year I spotted a rather nice top on my IG feed.  Turns out the pattern was one from a Burda magazine that I’d marked to make – you know the rest!

db5
top 124 Burda 05/2015

Having identified a lack of white tops in my wardrobe, it was decided to make the pattern up in some gorgeous white viscose voile from Croft Mill.  This fabric is to die for, just beautiful (but no longer available!).  Having bought 2 metres and found just how lovely it was, I immediately got another 3 to hide in the stash!  I know I’m supposed to be clearing it out, but this will be a useful stash, white never goes out of fashion.  *whispers* and I could always die it…

db8

The pattern is 124 from May 2015, available from the Burdastyle site as a download here.  I traced the 44 and added just the length part of a FBA as there was plenty of width for me.  I used the seam across the bust to add a total 3cm in length.  Seems to have worked pretty well.  Necklines too close to the neck aren’t usually my thing, I feel like I’m being strangled!  Scoop and v-necks are more my look, but this works.  The keyhole opening gives interest to the front (no mono-boob) and there’s enough room at the neck not to feel choked.

db6

French seams and double turned hems keep the insides all neat and tidy and the bias edges are lovely for the neckline.  I’ve worn this top at least one a week since making it, pretty much as soon as it’s clean and ironed, I’m wearing it again!  I think I need more white viscose voile tops!  The button is a vintage glass find from a local antique shop, so pretty!

db1
The silk version

I think it’s a good pattern for mixing and matching too, using scraps and odd ends of fabrics.  Just to test that theory I made another from stashed fabrics.  This top started with a piece of devine blue silk satin bought from Rosenberg and Son years and years ago (it was one of those you have to get, despite not having any idea when you’ll use it).  It was narrow and I’d cut bits out of the one end to use in a blouse about 5 years ago.  funny, that exact fabric is what I’m using in this top!  That blouse was the thinnest silk satin devore and it holied up pretty quickly.  But, as usual, I hadn’t thrown it out.

db2

My new top would combine fabrics again, but with the plain silk satin as the dominant fabric.  The back yoke and sleeves were cut from the larger areas of the original top and the blue fabric made up the rest.  It’s beautiful!!  The satin is heavier and drapier than the viscose voile, which has the effect of pulling down more – making that keyhole opening lower..  it’s fine while standing and walking, but when sitting, it’s a little too low.  Either I live with it or I do something about it, but I’m not sure what without totally ruining the look.

db4
Contrast fabric forming the sleeves and back yoke

French seams were not on the table this time round, the silk was too thick and would have left bulky evidence on the right side, so the overlocker was drafted in.  Hems aren’t double turned either, this stuff is slippery as all heck and a nightmare to turn on a tight curve!  Thankfully the bias behaved itself.  I really like this pattern, why did it take me two years to get round to making it up after marking it as interesting??

collage deep blue

I’m definitely going to be making more, it’s a pattern that could be useful for using up all sorts of smaller pieces of fabrics, and for playing with bias yokes – thinking stripes here.  I might even change the sleeve to a three quarter length and have some for my winter wardrobe, it’s about time to start thinking of warmer clothes now, like it or not.  And coats!!

My Sanctuary Garden

My little piece of heaven on earth

Making and Books

I like making, and I like books.

The Insouciant Stitcher

Creativity beats Insanity

Fabric Engineering

Creating a well-fitting wardrobe, piece by piece

Yet Another Unfinished Project

Crafting better mental health by sewing myself happy. Slow fashion, conscious consuming and an effort to live a more ethical life.

A Tailored View

The thinking behind a project

Poundcake

a lot of cake and a little frosting

Sew Everything Blog

Always sewing. Sewing Everything. Sharing the Sewing with Everyone

Your Stitches May Vary

sewing, making, and mental health.

The Easy Blues

craft, diy, natural dyeing

Creating in the Gap

Forever sewing

Love, Lucie

Where hands and minds are rarely still

U&Mii

Adventures of a plus size renegade seamstress

allsewpetite

Create beautiful bags with confidence!

tales of the sewing city

slow sewing, creativity, and a fabric obsession

Mainelymenswear

Be your own luxury brand !

Marsha Style

PDF sewing patterns & sewing blog

Buttons and Trims

Sewing - Learning - Making

Designed By Danita

"Seams" like I've been sewing forever!

the curious kiwi

Happily immersed in sewing nerdyness…

KJ Sews

Sewing and more

nelnanandnora

Faith, family and creativity

Sew My Style

Forever sewing

Offsquare

A refashion and sewing blog

Tailored by Kate

My sewing record

The Notions Tin

Forever sewing

Girls in the Garden

Forever sewing

The Savvy Sartorialist

Fashion, Lifestyle & Travel by Trish O'Sullivan

Needleswift

Sewing lessons in Lindfield, West Sussex

Just another blog

Permanently sleep deprived. Trying to make a lot of stuff.

jess sews clothes

blogging my homemade wardrobe

nomadiccharacter

Forever sewing

The German Edge

Forever sewing

Make&Wear - sewing-knitting-making

An Irish sewing, knitting and making Blog