Oh I have been remiss – this is only the second peek into my sewing process I’ve done this year! It has been a weird one, to be hoonest, so we’ll just move on, shall we? Today I’m making another Olya shirt. Another?? Well, yes. I love this pattern! Its simultaneously casual and smart, all depends on how you wear it. The fabric is viscose, but no one of those thin, floaty viscoses. This one has more body and weight, less floaty drape than you’d expect from viscose, so I think it’ll be perfect for cooler weather wearing. And yes, I think we can now safely say that it is moving properly into cooler weather!
This is one of the pieces I dug out of the stash after my last post, so maybe I am also acutally making pogress with “planned” Autumn sewing!! I bought it from Rainbow Fabric at their stand at the Festival of Quilts in August, knowing that it would be a shirt, but not sure at the time whether it would be an Olya or The Assembly Line’s Oversized Shirt. That one I’ve yet to toile. But I know the Olya pretty well now and I’m after a bit off quick sewing gratification!
So let’s get started, shall we? The instructions have you starting with the placket, but I usually get the back made up first, makes me feel like I’m already getting somewhere. Then it’s the placket, because you can’t do anything else until that’s sorted. I make a slight change to the placket, sewing it from the outside instead of the inside, as per the instructions. This is because I like the clean lines of a machine stitch and fold, rather than pressing a fold and topstitching. The look overall of the placket remains the same, I just prefer my finish.
With the pleats folded, ironed, and pinned in place and the placket done, the front yoke and sleeve piece can be attached to the main front piece. This is when it all starts to look like you’re getting somewhere! Now the side seams join the fronts to back and you have a rather large, unwieldy bit of fabric! I like that the instructions guide you to finish the seams as you go, with this unusual pattern, it’s good to keep track of that as you can’t always go back and tidy something up later.
Sewing the shoulders is always fun on this shirt, but follow the instructions to the letter and it’s very do-able. I pin the shoulder seams to the corner, then the sleeve into the armhole from the yoke joining seam to the end, leaving the section from the shoulder corner unpinned so I can rotate the fabric after snipping the corner. I find this easier than trying to get it all in place before snipping, or the converse, having all that flapping about when I’m trying to sew!
Sewing the sleeve seam is then a piece of cake, a quick press of the seam and topstitching finishes it all off nicely. This is when I quickly staystitch the neck, sometimes I remember and do it when the pieces are still seperate, but now is as good a time as any! The front bands go on now, after I’ve taken time out to interface them and all the other pieces that need interfacing. I know it should be done at the bgining, but I’m usually too keen on getting started, so I wait until I have to do it.
This is as far as I got today, other things to do! I’ll finish the front band, sewing it on the inside by hand before topstitching from the outside. Again, it’s just a finish I prefer. Then collar, cuffs and hem. I think I have suitable buttons in the stash, otherwise it looks like I may have to pay a visit to the charity shop to see if they have anything useful.
All these bits are ready to be sewn tomorrow, so hopefully I’ll get it all done by lunchtime, then it’s off to do other things.
I bet you hadn’t expected to read that title today! To be honest, I really expected the next post to be the completed jacket, but other things have cropped up to delay the completion, and I’ve had to jump onto another project with a tight timeframe in the interim!
Daughter No1 has a favourite white shirt, bought a few years ago now from Zara. It’s not only her favourite white shirt, I think I can say it’s her favourite shirt, hands down. So she wanted another – here’s where I step in. Can’t be that hard to copy a shirt pattern, right? Except that she cannot part with it very long, I have a short attention span, and I cannot take it apart…. Anyway, she left it with me a few weeks (at least a month) ago and I promised that I’d make a pattern from it and return it to her, asap.
The white shirt, collar, sleeve and concealed button fly
This weekend she asked, could she please have her favourite shirt back, she needs it! Bother – I haven’t done anything with it!! So on Monday afternoon I started figuring out how to do this. I’ve not actually made a pattern from a whole garment before, I’ve aways been able to cut them up! I started by pinning the front to some pattern paper, keeping the fabric smooth and trying not to stretch anything. It worked up to a point, getting to the whole of the shoulder line and the armscye got tricky and I had to unpin some lower areas to release the tension. I used a pin to pierce the fabric along the seam lines at sides, shoulder, neck and armhole, and just traced the outline of the front edge and the hem. I did the same with the back, and found out that it was off grain when I tried identifying the centre line… Also, the hem on the back is asymmetrical – this is not a design feature!
The sleeve has pleat details, edgestitching on collar, cuffs and front edges
Laying the two pieces over each other made me doubt that I’d done this right, the shoulders and armholes didn’t look right. A little Googling later I had decided on another course of action. I have a roll of freezer paper sent over to me ages ago by an American friend. I decided I’d iron this to the shirt, draw through the seam lines, peel it off and voila, I’d have a pattern piece. Again, this worked – to a point. Because it’s a large shirt I needed to move it around the ironing board a fair bit, so I couldn’t be sure that I’d not distrubed the grain, not stretched it out.
Freezer paper makes copying garments easier
However, when I compared the shapes obtained this way to the pinning method, they weren’t all that far off!! So, after checking the side seams were the same length, and the hem curve worked, I combined areas of the fronts and backs, traced both pieces and added front stand, seams, etc. Now for the sleeve! Sleeve is tricky, it has a box pleat at the sleeve head and a corresponding pleat at the cuff, but they are different sizes. There are another two single pleats in the sleeve head, one on each side of the box pleat. How to do this one??
I started with measurements. Length of sleeve seam, length from shoulder point to cuff, width of cuff, width of sleeve (including pleats) at cuff. Then I got happy with the freezer paper again, pressing it over the pleats and just marking where they go on the sleeve head. I ended up with a fairly good approximation of what the sleeve would look like, just needed to add the pleats! But – the sleeve head is not right, it’s too flat. I’ll have to come up with a different way to copy this part.
I’ve checked all the edges, trued up the lines and walked the sleeve around the armscye on front and back, and it all fits. The collar stand and collar were pinned to paper and I used the pin piercing method here again. Walking the patterns along the seamlines shows they fit again, so I think I’m ready to make a toile. I’ve allowed decent seam allowances so I can tweak areas if needed.
And the original shirt? That’s in a first class package winging it’s way to London! I just hope I’ve got all the info I need and that this toile works!! Have you copied an intact garment before? What methods did you use that were most successful?
Three minutes left of Wednesday – where did the time go!? I thought I’d show you all my latest sewing project, as I seem to have been sewing in secret lately, and only showing off finished items. Today, I’ve been making the Olya Shirt, pattern by Paper Theory. I bought the pattern in October/November last year but only managed to get it toiled last week!
My measurements suggested I make the 16, but the finished measurements indicated a lot more ease than I’d usually be comfortable with. Yes, I do know this is ssupposed to be an oversized shirt, but there’s baggy and there’s tent. At frst, I thougth I’d toile the 12, but hedged my bets and went with the 14 as a middle ground instead. Perfect choice! I decided it needed no adjustments, sleeves are the right length, cuffs not tight, shirt length fine and just enough “oversize” in the circumference measurements.
My fabric is from Rainbow Fabrics, viscose morrocaine (sadly now sold out). It has a lovely, crepe-like texture, and the dark dark navy and ecru irregular, zebra-ish stripe is right up my street. It is light and drapey, but has good weight and doesn’t slip around like ordinary viscose does. Cuffs, collar pieces and front band are interfaced with a fine sheer polyester interfacing, not adding bulk.
The construction of the shirt is different to your usual shirt, because of the style lines. The front yoke and sleeve are one piece,and the shoulder seam and insertion of the sleeve head happens in the same seam! It looks like it’s going to be clunky, but it’s anything but. Tara’s instructions are clear, unambiguous and direct. Some indie designers get so into the instructions that they get confusing and I ignore them entirely!
Top and middle, plackets on the sleeves. Understitching the back yoke. Right, box pleat, back yoke and stay-stitched neckline
One thing I did differently, right at the beginning, was to change the way the sleeve plackets are sewn. I sewed the tower placket piece as described, but the binding I sewed to the right side. This is because I don’t like seeing stitching on binding, and if I’d done it the original way, I’d have to stitch on the front. This way I handstiched the binding on the wrongside and topstitched the placket on the right. Small changes. I also staystitched the neck edges as soon as they were ready. You don’t put the collar on until quite late in the game, and I didn’t want any stretching.
I pick my sewing up in a bundle to prevent pieces hanging and stretching out while handling.
Talking about stretching out, be careful with handling the fabric pieces, the sleeve and shoulders can start to stretch before you get to sew them, so don’t let the pieces hang. I pick up my sewing in a bundle so nothing hangs and drapes and potentially stretches out before I get to sew it up.
Shoulder/sleeve seam, pivoting and snipping at the end of the shouder point, going into the sleeve head seam.
The instructions really do give a good result – don’t ignore them! (this is as much a note to me as it is to you!)
So far I’m really happy with my shirt, it’s all going together really nicely and at the end of the day I have the buttonbands, collar, cuff and hem to do. And I need to find buttons. What’s the bet that, even with a drawer full of buttons, I won’t have the “right” buttons?
Sewing plans for March! Having managed to get the coat finished in time has given me a bit of a boost, and I’ve decided on three new projects for the month, providing all goes well! I have some yummy fabric to use up, and I fancy some new, spring/summer appropriate trousers. Two are new patterns and one is a pattern I’ve used in the past, but haven’t made up in the last 5 years, so… Toile time!!
First, the patterns. I’ve been disappointed with Burda’s offerings this last year. If you’re not a skirt/dress person, there really isn’t much to make, unless you’re into lots of loose, floppy tops. But, there’s a pattern in the March magazine that interests me, and I think it might look good in the cotton/linen twill I got from Fabworks last month. The colour is even better in real life, so glad I got 3m!! It’s a sturdy fabric, the cotton definitely plays more of a role in the feel and body of the fabric than the linen does. Which means no flowing linen pants, but something with a bit more shape.
Pants 106 & 107 are basically the same pattern, but it’s 107 that I’ll go with. Only one little problem – no pockets! I’m sorry, but trousers need pockets!! So, I’ll toile them to check fit and length and whether or not I actually like them first, and then see if I can get pockets in there somewhere. I don’t think a patch pocket on the bum will look wrong, but I think the answer might be in-seam pockets.
With 3m of fabric to play with, I want to make something from a new-to-me company, Ottobre. I bought the 2020 Spring/Summer magazine and there’s a pair of trousers there I can see myself wearing – and guess what… It has pockets! It’s pattern #8, Utility Pants in cotton twill, so perfect for the fabric. These I’m definitely going to toile as I’ve never used this company before and hae zero idea of how they’ll fit. I am crossing my fingers though, I don’t want to have wasted the £11 for the book!!
And on to the third pair. This is a pattern I’ve use a fair bit, but forgotten I had until recently! My tailoring student had a question about frog mouth pockets and, after saying “what?” I found they were a popular shape pocket in the 60s in men’s pants, and favoured by James Bond! On seeing the photos, I remembered this pattern and hauled it out. It’s trousers 102 from the July 2009 Burda. It has the same pocket shape. I had thought I could use this pattern for the twill, but I think it’s too sturdy, but I also have some teracotta linen in the stash that I bought last summer…. I’ll toile the pattern because I have unfolded the shortenings, made too many contrasting pencil notes and drawn too many lines in the past over the seam lines to accommodate changing shapes! I’ll start with a straight 44 and see what needs to change from there.
I’m looking forward to making these! The weather is set to take a spring dip for the next few days, so it’ll be indoors anyway. Once I’ve finished my admin tasks, I’ll dig out the tracing paper and get cracking. Nothing better than sewing up a storm while the wind and the rain batter everything outside!
In amongst all the quick fix projects and, of course, the Sewing Japanese in January, I have started work on a coat pattern. This particular coat pattern has been in the making queue for some time, at least 5 years! Every spring I commit to getting it made, and every autumn I put the fabric back in the cupboard, because I haven’t got round to it. But not this year. I have the pattern, and I have actually cut it out!!! Mind you only the pattern – let’s not get carried away! I’ve checked the measurements of the pattern against my measurements and have been looking at what adjustments will be needed.
So, what am I going to make? I have a length of blue and white cotton jacquard that the girls bought me for Mother’s Day ages ago, I just fell in love with it. Then, in 2016 I saw a coat that Stephanie from Sea of Teal had just made, and it all clicked! That was the pattern I wanted for the fabric! A spring/summer coat, perfect. The pattern is Burda 6772, unfortunately it doesn’t look like you can buy it anywhere at the moment!
Burda 6772
According to measurements, I’ll be making the 44 with a small FBA and narrowing the shoulders. I might technically get away without an FBA, will need to toile the pattern as is before deciding. There is a hitch though, this pattern has a sidebody. Princess seams result in a side front, this has been attached to the side back as one piece, so you have centre back, side piece and centre front. I’ve not done an FBA with a sidebody before, so this could be interesting….
Measurement comparison, in centimetres
So, according to those measurements, I’d need to add 4cm of ease across the bust, 2cm at the waist but nothing on the hip. If I start by toiling the 44 as is, I know the bust will fit, but it will be too big across the shoulders and upper chest. I’ll have to figure out which way will work better for me. I guess that means it’s time to dig out the scrap fabric and start sewing. See you on the other side, but first, I have admin to finish so the toiling will have to wait for the weekend.
Here we are again! I’m still working on my coat, taking to heart the idea of sewing slower this year! I cut it all out on the weekend and spent considerable hours fusing all the interfacing onto the relevant areas and tailor tacking the pattern markings so I was ready to sew. Tuesday was to be a sewing day! In the end, I only started just before lunchtime, but as I kept going until 8pm, I recon I still managed to get a full day of sewing in!
When I tailor tack pattern pieces, I also pin pieces together and pin darts to make a pile of stuff that can go straight to the sewing machine, so I had front and back bodice darts, sleeve tabs and hood pieces all pinned together ready to start. The darts were cut up the centre and pressed open, with the flappy bits stitched down with herringbone stitch to stop them flapping about!
Front darts pressed open and stitched down
Once darts were sewn, the yokes were attached and the topstitching done. Then I made the sleeve tabs, sewed the inner and outer hood and made up the front band. After that, I couldn’t put off the pockets and their new opening detail any longer!
Welt pockets with a twist
New detail?? Well, I’m not overly keen on zip-opening pockets. I know they’re very practical, and they add a “sporty” touch to a garment, but zips are sharp and scratchy and my hands don’t like them very much. So I decided I’d use a detail from the pocket of my Seasalt raincoat. The pocket shape is actually very similar. They have two welts, one narrower than the other, and they overlap. The detail is suposed to mean water doesn’t get into your pocket, and having had worn the coat in the wet, I can say that’s true. So I copied that detail. I’ll do a seperate tutorial on the pocket in another post.
Pockets basted, then topstitched into place
I tacked and basted a lot with the pocket, if you don’t want things moving, and pins aren’t helpful, basting is the only way to go! Gathering the curved corners of the pockets wasn’t tricky, and makes for a nice smooth curve. I chose to use ordinary thread for the topstitching, possibly next time I’d use something a little thicker, I’m thinking that Denim thread though, rather than the proper topstitching stuff that my machine doesn’t like. I’m not unhappy with the finish, but it does disappear into the fabric a bit.
Front interfacing with chest piece
I thought I’d show you the insides where I put the interfacing. I use Gill Arnold’s weft interfacing on the outer pieces for structure. I fused the yokes fully and cut a funny shaped piece for the back that continued the line and scooped under the armhole to support it. The front got similar treatment, except that instead of just going into the yoke interfacing line, the interfacing scoops up and over the bust area and down the front to support and reinforce that area. I extended that line of interfacing down the front skirt. Sleeve heads get interface too, I measure approx 10 cm down from the top point in the sleeve head and draw a curve into the lower part of the armhole from there, always better not to have straight lines here.
Sleeve interfacing
All the hems are supported too. As this coat has 4cm hems, I cut 6cm wide bias strips of the weft insertion and fused onto the hemline, 3cm from the edge of the fabric. This means that when the hem is turned up, 1cm of the inner hem has interfacing on it, supporting the fold, the rest extends up the outer fabric and protrudes 1cm above the hem edge. This is what I will stitch into when I hand stitch the hem in place, not the fabric.
The facings and sleeve tabs, front band, inner hood front edge, and the opening for the pockets were fused with Gill’s fine sheer interfacing. Those edges still need support, but not as much as the outer fabric, and to cut down on bulk it’s better to use a finer, lighter interfacing.
Bias cut chest piece
For the fronts, I add a canvas chest piece that helps to minimise the appearance of the hollow in the chest below the shoulders. It’s a curved piece of non-fusible canvas, cut on the bias, fused to a piece of weft insertion interfacing, also cut on the bias. I remembered I have photos and a post showing this same step, but with white interfacing, from 2012!! On each side at the top ( shoulder edge), cut out a section 3cm down, this is to enable you to keep the canvas out of the seam area while you sew front to back
Shoulder seam pinned, chest piece pinned out of the way
Then the shoulder seam is pressed open and the canvas allowed back, turn the coat to the right side, and, supporting the body pieces, allow the coat to hand over your hand, simulating the shoulder. Pin the canvas in place through the back shoulder seam allowance, close to the seam.
Pin close to seam
Turn to the inside and pin again through the seam and the canvas, then remove the pins on the outside and stitch the cavas to the back seam allowance close to the original shoulder seam line.
Pin through layers on the inside
Canvas chest piece stitched to back shoulder seam
This make such a difference to how your jacket or coat looks, with a decent felt shoulder pad. This is as far as I’ve got for now, tomorrow I’ll get the hood on, sew the side seams and insert the sleeves. Then it will be time to cut the lining!
Mustard gold viscose twill lining
I ordered 2m of Mustard Gold interfacing from The Lining Company to grace the inside of my gorgeous coat yesterday, and it arrived this afternoon. It’s beautiful, the colour like gold, so perfect for the grey!! If I cannot find a lining “in real life” for a project, chances are pretty high that I’ll find one from The Lining Company. They have so many different types, and the colours…. I love that they send out 5 free samples, of a decent size, all properly labelled for proper decision making. And they’re fast… I just use their standard first class postal service, it arrives the next day anyway!! (no selling fee here, just my personal recommendation).
Well, here we go with all the coats and jackets! I traced 5 jackets and coats over the weekend, so I’d have no more excuses to get started, because a toile doesn’t take long to make, given it needs no interfacing and hours of pressing. They just need suitable fabrics, something sturdy and with a bit of body and weight – you can’t successfully toile a coat using an old cotton duvet cover!
I have the main fabric for all of these patterns, and lining for the two Burdas. The Sienna Jacket and Grace coat are unlined, but I think I might be binding seams on at least one of them, just to make it interesting on the inside. I also have lining for the Tosti, but am thinking of padding that out by quilting it to a thin layer of interlining, for warmth. As I’m still thinking about that, I haven’t gone ahead and bought the interlining yet, nor do I have any zips or snaps or anything else to make that pattern!
Pepernoot Coat from Waffle Patterns
I decided to start with the Pepernoot Coat because I love the big hood, raised waistline and flared skirt, not to mention those fabulous pockets! Now, I’m the sort who, once a pattern and fabric is decided upon, will put my head down and go, go, go, until it’s finished. But. I wanted to slow down this year, take a more considered approach. Even if it does mean I’m still making coats in the Spring and possibly early summer…
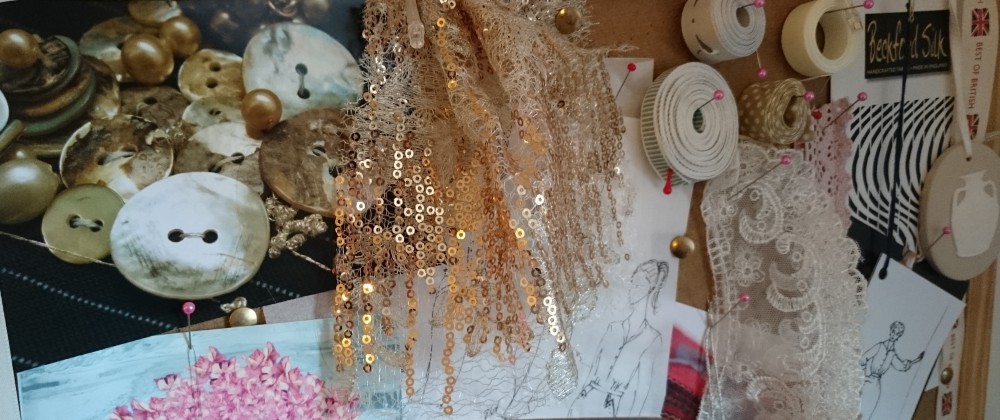
So, I have the most gorgeous, soft, grey cashmere for the Pepernoot, bought 3-4 years ago from Truro Fabrics in Cornwall. Everytime we’re in Cornwall, a stop at Truro fabrics is mandatory. There’s always at lease one piece of fabric that has to come home with me! 😀 But, I didn’t really think much about the lining I’d chose. So I don’t have any, and am trying to find the right colour. I don’t want grey, black, silver or anything dull.
I figured a day in Birmingham going round the big stores would solve my problem, so I headed off yesterday to visit Daughter No2 and buy lining. Except that I came home with no lining! The colours were all wrong, and most of the fabric quality was not what I wanted either, I really didn’t want a polyester lining in my cashmere coat! (snobby much?? ;)) However, in Fancy Silk stores, we spotted a very pretty jade green Chinese brocade with white and silver cherry brances and blossoms that made me think, a lovely rich green would be nice! But not that stuff, it was silk (sigh) 90cm wide and £22/m. Too rich for my little wallet, I’m afraid.
So I turned to The Lining Company instead and have ordered 5 samples of their lovely viscose twill linings, 3 shades of green, one gold/mustard and one copper. Grey and mustard is lovely, but I couldn’t shake the green idea, so we’ll see what they all look like once the samples have arrived. I did manage to get the separating zipper yesterday, so I feel I could get started with the shell in the meantime. I didn’t buy short zips for the pockets, because I have a different idea in mind, but haven’t checked that it works yet! That’s today’s task.
Pepernoot Coat toile. On the left (as you’re looking at the photo) is the unaltered bodice front, on the right is the one with the FBA
Along with the pocket opening treatment, I need to finish altering the pattern after performing FBA surgery on the bodice. My current measurements for Bust and High Bust are 101 and 95cm respectively, so I opted to trace the size 44, based on a full bust of 100. Once toiled with some lovely old smelly curtains from the charity shop, I decided I really needed more depth in the front, and only a little more width. So my FBA was a little contrary to the usual method, I decided the length needed and the rest followed! In the end adding 2cm on length resulted in just over 1cm of width, which has made the front lie straight, the waist seam sit parallel to the floor, and there’s a bit more room across the chest. I’m not sure why, but the measurement across the chest, armhole to armhole, is quite narrow on this pattern, made a little better when I insert a shoulder pad. I’m not wide in that area, but do have an upright posture and tend to hold my shoulders back quite a bit, so this seemed a little restrictive. The FBA has allowed more rooom, but I think I’ll be altering the armhole a little.
Toile with half adjusted and half not. Easy to see the wavy front on the left belongs to the half unaltered, the nice straight hanging front belongs to the half with the FBA.
Apart from that, I have no issues with the instructions, Yuki always has good illustrations if you’re a little stuck. I’m going to have to put a marker on the sewing machine for the 1.2cm seam allowance. I can move the needle over and keep the fabric on the 1cm line, but the tension can go funny if I do that, it’s not the machine’s favourite way to sew!
Jumping right in there with a work post, no hello, welcome to the new year, here’s my catch up and round up post, nothing! 🙂 I’ve been planning one of those, and just putting writing what I’m thinking my sewing will entail this year, but I just haven’t quite got round to finishing that post. Never mind, here’s something I have finally got back to, the jacket I toiled last year for Daughter No1.
The pattern is jacket 107 from March 2019, the minute I saw it in the magazine I knew it would be good for the girls, and I had just the right fabric in the stash for Daughter No1. In fact, it had been waiting for this sort of jacket for a rather long time – possibly getting on for 10 years now… Slow, moi??
Jacket 107 Burda March 2019
I traced and toiled the 36, the smallest size in October on the afternoon she was due home for a weekend visit, along with a number of other pattern, intending to do a mass fitting! The jacket was met with great approval, most of it was fine, but there were going to be alterations due to the fact that she’s petite and should probably really have the size 34.
The toile made in October
So, alterations:
Sleeves 4cm too long
No pockets…!!!
Shoulder length too long, and
Sleevehead not fitting where it should.
Line indicating where the armhole should be. I know, it’s a little feint…
We demand pocketsess!
No massive jobs there, but I found other projects that were more interesting than altering a pattern and got a bit distracted! If you follow Stephanie at Sea Of Teal, you’ll know that she’s running #SewYourWardrobeBasics this year (more info in another post). No fancy sews, just those things you really need in a me-made wardrobe that can get overlooked by pretty, flouncy stuff. This month’s theme is denim, and it was the push I needed to get another pair of jeans made (post still in the works). But as we’re only halfway through the month, I thought, what else can I make using denim? That’s when I remembered the jacket. It’s time.
Today’s task was to do the alterations and get started on a new toile, I want to make sure the fit is right before cutting my denim. First was to shorten the sleeves, which was quick and easy, just remember when you do this alteration to true the seamlines afterwards. When adjusting a pattern, I always note the original stitching line, and any ajdustments I do, ie. how far I moved a line, the direction I moved it in, and the date I did the deed. It helps when you come back to it later.
For the shoulder adjustment, I had to cut the yoke at the shoulder line (it has a dropped front shoulder line) and then do the rest. I made the adjustment in the centre of the shoulderline and slid the outer section in 1.5cm. Then I trued up the armhole seamline and raised the underarm by 0.5cm. I walked the sleeve head along the new armhole lines just to make sure it all still fitted ok, and we seem to be in business.
Armhole and shoulder adjusted, with notes on how far I went and the date
Next up, pockets. You do need pockets in a jacket, especially one that’s pretending to be a posh biker jacket. I’d marked with pins on the toile where she wanted the pocket to be, and how wide the opening was, just needed to work out the pocket bag size. Simply put, the pockets need to fit a hand (possibly with gloves on) and a phone. She’d also decreed a welt flap at the opening would look nice, so I now have those pieces all drawn and ready to go.
The shape and size drawn onto the pinned together front pieces. I was careful to avoid the hem stitching area!
New pattern pieces, pocket bags and a welt.
Now I need to toile and wait until we see her again to check the fit – unless I just post it to her and we do fitting from a distance! Thank goodness for the internet!
Phew, another week has flown by and I actually have another work in progress for you! To be fair, I’ve managed to complete that work in pogress by now, but I thought I’d share some of the making process, just for interest sake. The work in question is a pair of True Bias Lander Pants. Or Lander Pant, as they’re described. Now I don’t know about you, but this term gets me, it’s like referring to scissors in the singular. It’s a pair of scissors, and a pair of pants/trousers/shorts! If you only had a pant, you’d be arrested for indecent exposure! And you’d be cold…
Anyway, that’s just me – I think. So, I had bought this pattern about this time last year, intending to make a pair for myself, and for Daughter No1, who wanted a pair of pants that really fitted closely to the hip, then almost flared out, culotte-like, to a cropped 7/8ths length. Finally tracing the pattern on holiday in September, I thought I’d start the experiment with a pair for myself, as you do! I traced the 0 for Daughter No1, and the 12 and 14 for me, not being 100% certain which would be better. Upon toiling and double checking measurements, I decided to go with the 12, because there’s a massive 2.5cm seam on the outside leg for adjustments. The hip measurement of the 12 is 2cm wider than my actual measurement, but the waist is a fair bit narrower, so I wanted wiggle room!
The toile showed me the straight 12 would be fine, even the length was good! That’s a small miracle in itself – I was fully prepared to remove up to 4cm. In hindsight, and this would have showed up if I’d used a stiffer fabric for the toile, I should have shortened the crotch depth by 1cm and possibly gone down a size at the inner leg seam. I’ve made those adjustments on the pattern for the next time.
Now, the instructions… Hmm. I bought the zip version (you need the original version before this will work…) because I knew I wouldn’t do the button fly, and it’s not Daughter No1’s bag either. So there are duplicate instructions for most of the making, and you have to slot the zip instructions into the order of work, which is fine. But I have never seen front fly instructions like it. They’re almost as weird as the ones for the Peppermint wide Leg pants! I have no idea why some pattern makers make inserting a fly zip so complicated when it’s really not necessary.
The other thing I have a real problem with are the Imperial measurements used throughout. There are people in this world who have no idea what 1/4 of an inch is, how big it is and what it looks like, nevermind having something on a machine to measure that. So the first thing I did was to convert all the bits of inches throughout the instructions to metric. Seam allowances are 1/2 inch, which in metric is 12.7mm. I do not have that marking on my machine, or my rulers. So I had to borrow a quilter’s gadget from a friend with all those little bit of inch markings on it to use for turning up edges and marking topstitching distances. This all takes time and delayed the completion of the project. Please, pattern makers, please just be more inclusive and include more universally recognised measurements!
I also reversed all the zip instructions, because, just like the Ash Jeans I made last week, the zip opens the wrong way. Luckily, while doing that, I was able to alter the other zip instructions so they were less complicated and wouldn’t have the “you won’t be able to get all the way so there’ll be a hole, but that’s ok” moment. So, the work in progress post will go over the revised zip instructions! Phew, let’s get started.
Number one, don’t sew the front and back legs together at the inside leg seam, nor do you want to sew the entire front crotch seam from the zip stop to the upper centre back before you’ve put the zipper in, trust me. It’s a fiddly job at the best of times, especially if you have a stiff fabric, so there’s no way you want to be wrestling with all that excess fabric when it’s completely unnecessary. My instructions will be for the fly as I have sewn it, on the opposite side to that in the pattern. If you like your zips opening the other way, simply reverse the lefts and rights.
Make up the pockets and do all the topstitching and then you’ll do the zip. You’ll need both front pants pieces, the fly facing, zip and fly guard. You want the front pieces to have the fly extension marked, as well as the centre front and the zip stop. Use chalk or tailor’s tacks, whatever works better for you – or both like me. I cut off the right fly extension along the marked line and then overlocked both front seams. At this point you can also overlock the fly facing and make up and overlock the fly guard.
Sew the two front pieces together from the zip stop marker to about 2cm before the end of the crotch seam, along the front seamline. Now pin and sew the fly facing, right sides together, to the right front, go right up to the zip stop. Press that seam onto the facing and understitch, stitch all the way past the zipstop to the end of the facing. Turn to the inside and press well. Pin in place. (I use a lot of pins!)
Press left fly extension to the inside
Fold the left pants piece in along the fly extension line and press well. Pin the zip with the head of the zip 19mm (3/4 inch in the instructions) from the top of the opening to the fold, keep that fold tight up against the zip teeth. Pin and BASTE. I rarely baste, but for inserting zips, this step cannot be ignored. With the zip foot, stitch up from the bottom, close to the edge of the fabric. You’ll find you cannot get past the zip head smoothly, so stop about 3cm before the top of the zip, with the needle fully down, lift the presser foot up and push the zip tab down to past your presser foot. Now put the foot down and continue to the top.
Sew zip to left front
Line up the right centre front with the marked centre front on the left, I pin along this fold, through all the layers. You’re now going to sew the other side of the zip tape to the fly facing on the other side.
Pin centre front lines together, but you don’t need the perpendicular pins shown on the left. The facing needs to be free
Fold the right front on top of the left so that the zip and facing are together. Pin the tape to the facing, baste and stitch, with a zip foot.
Pin zip tape to fly facing, baste and stitch
From the right side now, measure approzimately 3.5cm from the centre front on the right. This will be the line you’ll use for your fly topstitching. Now, normally I’d wait until I had the fly guard on to do this step, but it does work this way with a thick fabric. If you attach the fly guard now, and then topstitch, you’d have to pin the guard out of the way of the stitching, which means making a lumpy bulge at the base of the zip. This would interfere with the topstitching. If you were using a linen, I’d wait and do this step after the fly guard is on because it’s a less bulky fabric..
Mark the topstitching on the right
Pin perpendicular to the marked line so you’re catching the fly facing to the front of the trousers, you don’t want them shifting as you stitch. Now load your topstitching thread and stitch along that line, or either side of it, if you’re using two lines of stitching.
Layers pinned together, ready to stitch
I used a denim twin needle – a little cheat, but so worth it for even, parallel lines of stitching. This is the reason why I topstitched now rather than later, because I didn’t want to mess up the curve or have extra stitching showing.
Fly topstitching
Now, remove all the pins on the outside and turn to the left fly extension and zip tape. You’ll need to sew the fly guard to this section. Fold the trousers over eachother so the extension and zip tape stick out and pin the fly guard overlocked edge to the seam allowance, sandwiching the tape between the guard and the fly extension. Pin and stitch, using a zip foot. Pull the fabric of the trouser piece well over to the left so you can stitch as close to the fold as possible.
Pin the guard so the zip tape is sandwiched
Now, because we have topstitched the fly facing already, you won’t be able to get all the way down, but it really is ok this time, because we will be catching the guard in in other places, so this won’t be flapping about. Just go as far as you can.
Finshed fly.
Now, on the right side, and with a single needle and topstitching thread, stitch for about 1-2cm along one of the lines of existing stitching to catch that guard to the right front. Then you can sew the front and back pants pieces together along the inside leg seam and then sew the remains of the crotch seam. Press that seam to the right side in this case, and topstitch it down. The topstitching past the fly stitching will secure that end of the fly guard, so there you have it, no flappy guard, and a zip in without all the excess fabric and trouser legs! You can now sew the outside leg seams and finish the trousers as per the original instructions.
I hope that was all as clear as mud! Really, once the fly zip is in, the trousers are quick to make up, depending on how much topstitching you’d like to do! I wanted to have double topstitching along the waistband but didn’t want to use the twin needle because of how it would look on the inside. However, despite my Bernina being quite happy to use this new Denim thread from Gutermann in the needle, it didn’t like it very much in the bobbin. I spent ages messing aroud with the tension, thought I’d cracked it, but when the stitching was done on the waistband, it wasn’t good enough. As I really didn’t want to unpick it, I tried to make myself think it’s ok, no-one else will see it, but it didn’t work!
Horrible, messy tension in the bobbin thread on the waistband.
So I ripped it all out (sob) and replaced the denim thread in the bobbin with normal thread and just settled for one line of topstitching. It doesn’t look wrong. The button is a leather one from the stash, I think it’s from a charity shop originally, as I only have the one.
New single line topstitching, much neater!
So that’s that! I now need to get some proper photos of the Ash Jeans and these, and Daughter No 1 has promised me photos of a pair of trousers I made for her last month. They’re gorgeous, by the way! Can’t wait to show those off! Now, I’d best go and make dinner, someone’s getting hungry…
I’m making jeans! I haven’t made a pair of jeans since 2016, when I made 5 pairs of Birkins! I did some research on the current favourites, as well as patterns that have been around for a while, and, despite the fact that I already have the Ginger jeans pattern – and have yet to use it, I bought something else entirely! I’m not that sold on the Gingers. I traced them while on holiday in September, and the more I traced, the more I realised this was not the pattern for me. The shapes weren’t right for me!
My choice for this year is the Ash Jeans pattern from Megan Nielsen. I dithered a bit over the Dawn, but realised I wanted jeans with stretch, so that meant the Ash. I like that there is a choice of 4 leg types, and a very decent size range. I toiled the 31 – which, according to my measurements should have been just about perfect, but they were waaaay too small! I made the slim leg, but they turned out like leggings, all over… I actually couldn’t close the button. So I went back to the size tables, compared the Birkin Flares and my Burda measurements and the Ash measurements to get an idea of what I should have done with this new to me pattern company. In the end I retoiled using the 35 at the waist, going to the 32 at the leg. That’s a big jump! And they were a little baggy, so in the end I’ve got a 34 waistband, moving quickly to the 33 just above the hipline and merging into the 32 by the crotch level. The only thing that’s close to my measurements is using the 34 at the waist the other sizes should technically be too big. Here goes nothing!
A post shared by Anne W (@compulsive_seamstress) on
I re-arranged the order of work slightly by making up all the small bits first. I overlocked the pocket edges, pocket facings, fly pieces and belt loops, then ironed the turnings and folded over the top edges of the pockets. Then I topstitched all the pocket edges and made up the belt loops. Now they’re ready for use when I need them.
All the small pieces ready for overlocking and topstitching
Back pockets pinned in place. The chalk on the corners shows me where to stop and change direction when topstitching
Next I attached the back yoke to the back leg overlocked that seam and topstitched. Then I attached the back pockets. This means less changing of topstitching thread. Then I overlocked the centre back seam and the outer leg seams of the back and front pieces. The centre back seam was next, followed by topstitching. Now the back is ready.
Pockets on, topstitching and overlocking done
Back seam sewn and topstitched
Next was zip. I reversed the zip so it would open to the left, like all my other trousers. I guess it’s a hang-over from when jeans were exclusively menswear, but I don’t like my zip opening the “wrong” way. I chose a green thread for topstitching, just an ordinary thread. My Bernina will do a lot I ask of it, but it baulks at topstitiching thread, whether in the top or the bobbin. It just doesn’t like it. I didn’t change anything in the zipper instructions, apart from reversing the sides to sew things to. But I did chalk on the centre front line on the left, and pinned the right CF to that line before attaching the zip tape to the right fly facing.
Fly done, topstitching complete
Front pocket bags are cut from the back of one of hubby’s shirts. Don’t panic, he’d managed to wear through the collar and get holes in the sleeve where the cuff joins, so it had already been relegated to the “re-use for something else” box. I unpicked the back darts, gave it a good press and cut the shallow pocket. I’ve used French seams for the bottom hem of the pocket, it should add strength. Once the pockets were done and topsttitched, I overlocked the outer leg edges.
Attaching the pocket facing and coin pocket to the pocket bag – made from a Ted Baker shirt!
Pockets done, outside leg seams to go
Now to sew the front to back along the inner leg seams, and then overlock those seam allowances together. At this point you’d usually press to one side and topstitch, but I’m going to skip that step on these jeans. If I decide I really need topstitching, I figure I can get in there and topstitch afterwards as the legs are fairly wide. It shouldn’t be that tricky… The side seams are now sewn and the top section topstitched to keep the seam to the back. And that’s it for today, I’m hungry! Somewhere along the line I kinda forgot about lunch. So tomorrow I’ll attach the belt loops & waistband and do the button and hems. Fingers crossed it all works out!