When a pattern is perfect, it is only right to make it again and again, right? I’ve made so many versions of my favourite Burda trousers, a certain Burda jacket and some of the Style Arc pants – and this shirt. I have other patterns. But I do love this one! Mr Not-Compulsive thinks I need to branch out, try other shirts too, but I’m still all starry eyed over the Olya.
So here she is, I think this is the seventh one I’ve made now. I love the print of the fabric, it’s also a nice weight, so perfect for winter wearing. Some of the others are a little thin – necessitating a jumper if they’re to be worn when it’s chilly, and boy, are we going down that route fast now!! It’s hard to believe that just a month ago we were in the middle of a mini heatwave! (Please note, I started writing this post at the beginning of October!)
So here we are now, a month down the line and definitely in cooler temperatures. I love this shirt, it looks great with jeans and my rust coloured winter trousers, so I know it’ll be worn loads over the winter. But hubby is right – I do need to branch out. I’ve been working my way through a number of FibreMood magazines that I’ve bought, tracing out the interesting looking blouses, so hopefully I’ll find the time to toile some of those and make them up in some of the gorgeous fabrics I have in my stash!
Oh I have been remiss – this is only the second peek into my sewing process I’ve done this year! It has been a weird one, to be hoonest, so we’ll just move on, shall we? Today I’m making another Olya shirt. Another?? Well, yes. I love this pattern! Its simultaneously casual and smart, all depends on how you wear it. The fabric is viscose, but no one of those thin, floaty viscoses. This one has more body and weight, less floaty drape than you’d expect from viscose, so I think it’ll be perfect for cooler weather wearing. And yes, I think we can now safely say that it is moving properly into cooler weather!
This is one of the pieces I dug out of the stash after my last post, so maybe I am also acutally making pogress with “planned” Autumn sewing!! I bought it from Rainbow Fabric at their stand at the Festival of Quilts in August, knowing that it would be a shirt, but not sure at the time whether it would be an Olya or The Assembly Line’s Oversized Shirt. That one I’ve yet to toile. But I know the Olya pretty well now and I’m after a bit off quick sewing gratification!
So let’s get started, shall we? The instructions have you starting with the placket, but I usually get the back made up first, makes me feel like I’m already getting somewhere. Then it’s the placket, because you can’t do anything else until that’s sorted. I make a slight change to the placket, sewing it from the outside instead of the inside, as per the instructions. This is because I like the clean lines of a machine stitch and fold, rather than pressing a fold and topstitching. The look overall of the placket remains the same, I just prefer my finish.
With the pleats folded, ironed, and pinned in place and the placket done, the front yoke and sleeve piece can be attached to the main front piece. This is when it all starts to look like you’re getting somewhere! Now the side seams join the fronts to back and you have a rather large, unwieldy bit of fabric! I like that the instructions guide you to finish the seams as you go, with this unusual pattern, it’s good to keep track of that as you can’t always go back and tidy something up later.
Sewing the shoulders is always fun on this shirt, but follow the instructions to the letter and it’s very do-able. I pin the shoulder seams to the corner, then the sleeve into the armhole from the yoke joining seam to the end, leaving the section from the shoulder corner unpinned so I can rotate the fabric after snipping the corner. I find this easier than trying to get it all in place before snipping, or the converse, having all that flapping about when I’m trying to sew!
Sewing the sleeve seam is then a piece of cake, a quick press of the seam and topstitching finishes it all off nicely. This is when I quickly staystitch the neck, sometimes I remember and do it when the pieces are still seperate, but now is as good a time as any! The front bands go on now, after I’ve taken time out to interface them and all the other pieces that need interfacing. I know it should be done at the bgining, but I’m usually too keen on getting started, so I wait until I have to do it.
This is as far as I got today, other things to do! I’ll finish the front band, sewing it on the inside by hand before topstitching from the outside. Again, it’s just a finish I prefer. Then collar, cuffs and hem. I think I have suitable buttons in the stash, otherwise it looks like I may have to pay a visit to the charity shop to see if they have anything useful.
All these bits are ready to be sewn tomorrow, so hopefully I’ll get it all done by lunchtime, then it’s off to do other things.
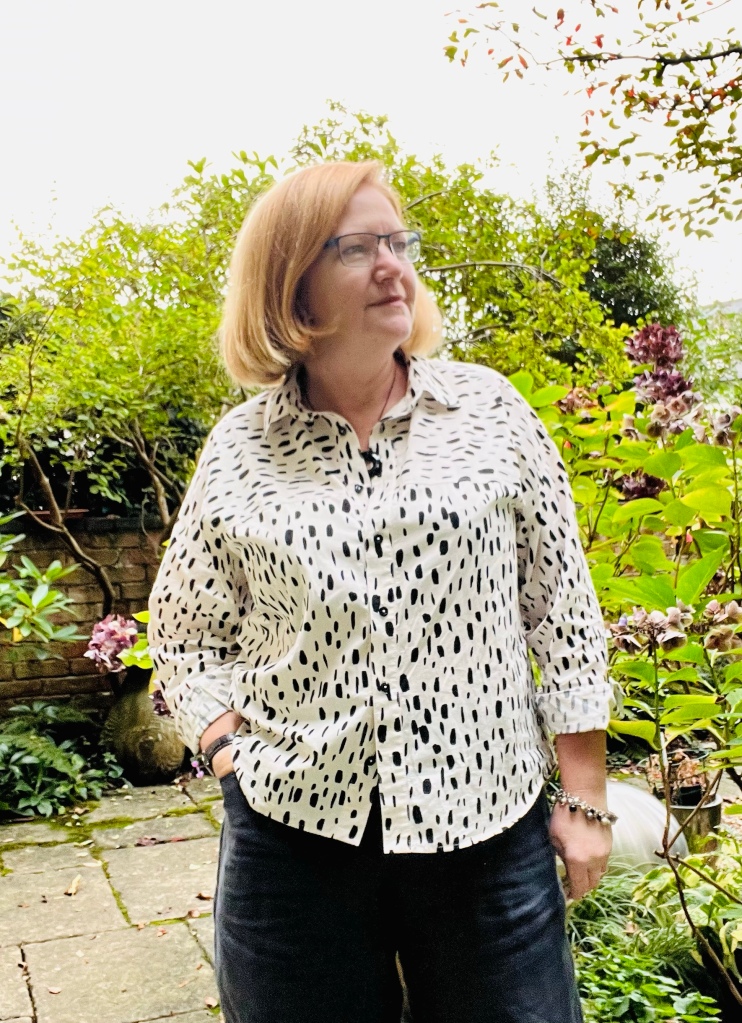
Another Olya – oh yes!!! This is one of my absolute favourite patterns at the moment, and making it in a lightweight cotton is the best!! The fabric is from Stitch Fabrics, aka Rosenberg and Son. I happened to “spot” it in a story on Instagram and knew I had to have some! A quick hunt through their website netted me 2m in double quick time and I couldn’t wait for it to arrive! It’s really lovely, soft and drapey, but with a certain amout of crispness which is really nice. Unfortunately, it’s no longer on their website, I looked! It has an ivory ground and brilliant blue blobby spots, the colours just sing.
Slightly smug in my new shirt!
I made the straight size 14 again. My measurements put me in a bigger size, but I am really happpy with the amount of ease in the 14. I’m pretty sure the bigger size would just feel like wearing a tent! There’s only so much “oversized” that I’m happy with. That’s the nice thing about the patterns with loads of ease, you get to choose just how much of that ease you’re comfortable with! The only thing I changed was to alter the placket opening to a simple continuous bias instead. This is just for speed, I really wanted to get this shirt made in time to wear to visit Daughter No1 in London. I had a little scare when it was button choosing time – I was three short! Why does this always happen? A drawer full of buttons, and I don’t have enough. Anway, I thankfully found those three when digging through another box! Phew!
The shirt looks great with my new Worker Trousers and I’m sure, will look fab with the linen trousers in the summer boxes currently languishing in the loft. Roll on summer!
Back in the day when the doctors wrote their prescriptions, I can’t believe the pharmacists actually knew what was written! The squiggles on the fabric remind me very much of those scribbled prescriptions. 😀 I give you my latest Olya Shirt, pattern from Paper Theory. The fabric is a piece of cotton voile from Croft Mill fabrics, as mentioned in my last post. It’s a very good price, and the fabric is the softest, drapiest ever! It’s going to be lovely to wear in the summer…. But I will wear it now, just with a cami underneath and a jumper over the top – especially as I’m determined not to have the heating on unless I’m a shivering wreck!
Paper Theory Olya shirt
Most of the modifications were mentioned in the Work in Progress post, so this post covers the last minute changes in design direction, and of course, it’s for showing it off, all nice and finished!
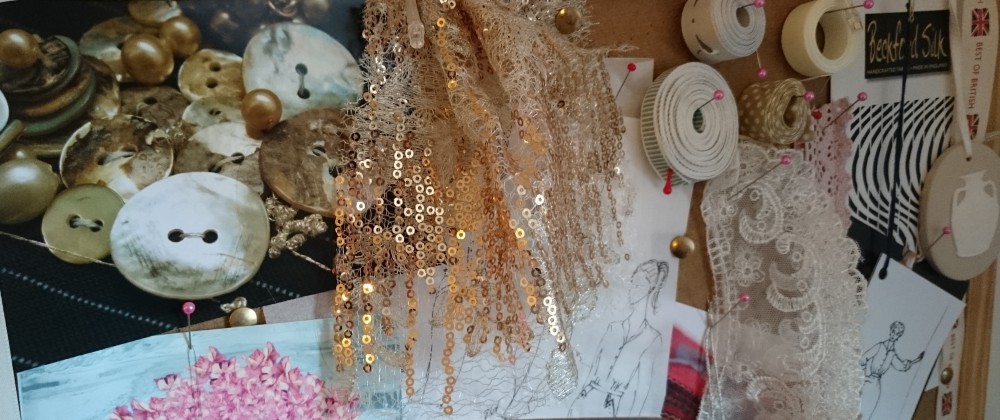
All the details
The selvedge has a lovely coloured edge, and I wanted to incorporate it into the top in some way. I used the strips down the edges of the fabric already cut and added them to the collar stand to start, I thought it looked quite nice, giving myself the green light to do more. So I cut a shorter piece and sewed it into inside seam of the buttonstand on the button side, just from the collar to the yoke joining seam. I really like the way it looks! It might be a monochromatic print, but there’s colour in there too! I like this little bit of fluff, it makes my shirt even more personalised, and that’s what sewing is all about, right?
Buttons are all from the stash, reused from one of hubby’s shirts that fell apart. I had toyed with adding more of the selvedge to the cuffs. For now they’re plain, but I might add a bit later as there’s plenty left! I have about half a metre of the fabric leftover, I hope I can use it productively in another project, it would be a same to waste it.
I love the pop of colour!
Next on the cutting table are two vintage projects for the girls. One is a 70s jacket in chocolate brown fine whale corduroy, and another a pair of 80s pleated trousers in grey wool flannel. I’ll let you guess which project is for which daughter!
Well, what do you know! A progress report on a Wednesday – and only the second of the year… Oh dear! Nevermind, progress is progress. Today’s project is one that I cut out about a month ago, thinking that at least with it already cut, I might get on with it quickly…. Yeah. It’s another Olya Shirt from Paper Theory, this time in black and white squiggle print cotton voile bought from Croft Mill in August.
Continuous bias strip for the sleeve placket
I’ve cut the 14 again, like I did for the first three. I went down a size for the linen version but I actually prefer the bigger one, it feels better in the length especially in the arms. The fabric is just lovely, so soft and light! It was possibly something I should have got on with in August, it’s more of a summer weight than an Autumn/Winter weight!!
Back pleat
I’m changing the sleeve placket detail, just keeping it simple this time with a basic bias strip instead of a tower placket. I’ve added some reinforcing stitching the the back pleat, something different. Today I’ve got the majority of the work done, it look like a shirt! Tomorrow is buttonstand, collar and cuffs, the hem, and buttonholes and buttons. I hope I have suitable buttons in the stash.
It looks like a shirt!
I do love this pattern, and I have another black and white cotton print waiting to be made into another Olya!I don’t think you have have too many black and white shirts, can you? Just like classic plain white ones, they’re always useful!
I honestly didn’t think it would be such a huge gap between posts this month, especially given how much sewing I’ve done! Anyway, you cannot turn back time, so all I can do is get on and show you all what I’ve been up to! I’m starting with my latest Olya Shirt, pattern from Paper Theory. This is my fourth, and I really do have a plan to make another. We were in London last weekend, so I finally managed to get photos, thanks to Daughter No1!
After making two in different types of viscose and one in cotton lawn, I now have a linen shirt. I sized down with this version, the others are a tad too long in the sleeve, more noticeable in the viscose versions. I thought it might be nice to have an oversized shirt that wasn’t quite that oversized, especially in a fabric that’s stiffer and less drapey. It was the right decision! So this is the size 12, with no alterations or adjustments.
Olya Shirt from Paper Theory
The fabric is from Simply Fabrics in Brixton, the first time I’ve bought fabric from this shop. I’d been browsing for a while, and when I saw this stuff I knew I needed it in my stash. But I hesitated for a bit – hesitation that was rewarded with an announcement of a nice big discount! I used it and swooped in on the fabric. I love it! I think the combination of fabric and pattern has really worked. I like finding different prints like this, and I’m glad I feel comfortable wearing them, as I’m a plains person at heart!
Sewing the shirt went as smoothly as the last three times, if not better because it’s linen, not slippery viscose! I like this smaller size and might stick to it for the next shirt, which is definitely going to happen. I have some left over pieces of linen from various projects that I’m sure I can put together to make a shirt. Fingers crossed, but please, don’t hold your breath!!
There’s a new colour in my wardrobe – and I think it’s here to stay. I made my first green item in 2019, a pair of linen Teddy Pants. They were followed by a pale green and white pair of Kana’s Standard pants and an LB Pullover in the same fabric, but that’s as far as that incursion went. Until this year… I fell in love with a Monstera print, olive green and ecru, and just had to have it! What would I make with it? Why another Olya Shirt – of course!
Olya Shirt and Kew Pants
No pattern or fitting adjustments or changes from the last time, I’m pretty happy with the pattern on me. The only thing that would change would be how the fabric altered the finished look and shape of the shirt. So far my favourite is the black and white graphic print Olya, it’s soft but has body. The striped one is a fairly heavy viscose, so it hangs more. This viscose challis is soft and drapey and feels fabulous! I bought it from The Rag Shop at the end of May. Knowing that we’d be away for the last week, I asked that the shipping be held back so that the parcel would arrive after the May Bank Holiday. It worked, and I had pretty fabric to add to my holiday purchases on the wash line!
The fabric was lovely to work with, and I knew just what to pair it with on the bottom half! While in St Ives, I bought 2m of a cotton/linen blend, the colour is a pale beige – the result of two colours woven together, white and beige. It’s got body and no drape, but it is perfect for trousers. I decided on the Kew Pants from Style Arc. I’ve made then only once before and thought that this fabric would be great to hold the shape of the cocoon leg. I made the 14 this time, the waist of the 12 is just too snug.
I altered the angle of the front crotch line and curve, and took the inseam in by an extra cm, made the front look much better. The waist fits properly now and the cropped ankle length and width works better in the bigger size. The curved hem detail can be a little tricky to get nice looking on the inside. The pattern instructions have you simply fold under the seam allowance and topstitch in place, but it really isn’t a nice finish. I cut short pieces of off-white bias binding and used them instead, pressing in a tight curve first.
These are such cool pants, I love that they sit nicely on the waist and the rest is loose. The pockets are a good size, perfect for a phone, mask and card wallet! I rarely use a handbag these days, not needing cash means no need for a proper wallet, all I need is plastic. Pairing the black and white Olya with the black Kew Pants I made last year looks great, so I was keen on repeating that with these two projects.
I love these two items together, tucked in, tied in front or simply left loose, they’re comfy and good looking! Being beigey-cream, the trousers slot into my wardrobe perfectly. I love the addition of green in the wardrobe this summer, I have a RTW green and ecru tee bought in Padstow to add to the mix, and am planning a plain olive tee soon!
I am late to this particular appreciation society. I have numerous Paper Theory patterns, but only purchased the Olya Shirt in October last year, and only made it up in May! And people, I cannot tell you why I left it so long! I can only say that I thought wearing a “proper” shirt again after living in jersey tops would feel odd. Well – it doesn’t! I bought the pattern after making the blouse with the huge sleeves last year, there was just something about that fabric sitting on the cutting table that made me think of the Olya pattern, and I jumped.
This version was made hot on the heels of the dark navy blue one, as in I cut it out on the Saturday morning after the Friday finishing! No changes to the overall pattern, just the sleeve binding and placket construction. This time I sewed both pieces to the outside and turned them in, instead of sewing to the inside. I just prefer this method. It means I just sew the straight seam and leave out the short sewing line making the “box” at the top, as this would get in the way of getting everything out of the way to the inside. The finish is good and I’m happy with it- having handstitched on the inside again. And guess what – this time I managed to get the pieces on the right side! I have proper cuffs!
What I love is how different this one feels to wear compared to the heavier viscose crepe of the first one. I’m going to be making more of these! The fabric is a cotton/silk voile that I got probably 3 years ago now, and it’s fabulous to work with, even better to wear! Usually I’d French seam this fabric, but opportunities for that finish on this shirt are non existant, so the overlocker had to do. It is still neatly finished on the inside, and there is no visible bulk on the outside. Cuffs and collars and the buttonstand were interfaced with fine sheer fusible. I was lucky to find enough buttons in the stash that worked, I didn’t want solid colour buttons, so these with the fleck of white work really well. I’ve worn this shirt so many times since making it – basically as soon as it’s washed and ironed I make a reason to wear it!
I love the pleat from the yoke and the longer line shirt hem
I love it with the trousers in my current wardrobe – particularly the Kew Pants and Teddy Pants from Style Arc, & I can’t wait to try it with the linen trousers in my summer wardrobe, but the weather is seriously messing us around! April was cold and dry (only 9% of the usual rain fell!) and May is making up for that instead of being the glorious introduction to summer that we all love. So for now, I only have winter trousers to try the shirt with, but I’m happy anyway. I have some olive viscose with a leaf print on its way for another shirt, and I might have had to order olive linen for trousers to go with it! It looks like olive will be my new rust.
In the mean time – if you’ve been eyeing out this pattern with an idea of making it, look at the photos on Instagram, #olyashirt, and see how well it suits just about everyone who’s made it! If you’re not into too much ease, go down a size or two when you toile, but give it a try! I really do love this pattern and I can see more in my sewing future – I might even try a colour blocked one!!
Well, here’s the first of what will be many! Finally I have photos of the finished Olya Shirt I started at the beginning of March. With the weather being so rubbish, I had a long time to wait for something decent that did the shirt justice. Of course, this means that in the mean time, I was able to wear the shirt and be even more happy with it!
Olya Shirt from Paper Theory
As described in the work in progress post, I made the 14, with no adjustments. I also changed the constructions of the cuff binding and tower plackets slightly – spending so much time on getting those pieces on nice and straight that I made a rather large mistake… I put them on the wrong sides!!! Nevermind, the shirt still works, but I was annoyed when I finally discovered it when I put on my perfectly made cuffs!
It hasn’t altered my love of the shirt. As previously stated, the instructions are good and clear and leave no doubts as to how to proceed. The fabric is viscose marocaine, which has a crepe-like texture. It’s heavier than regular viscose, not as drapey. It was great to work with as it doesn’t slip around!
I’ve worn this shirt loads and now wonder why I hadn’t got round to making it earlier, I have had the pattern since October! I’ve made a second already, and am planning a third to happen pretty soon!
The eternal question for sewists – or at least one of them – is this: How do you get a nice sharp corner on collars and cuffs. Include waistbands, lined pockets and jacket revers with notched collars. Here’s the method I use, it involves no cutting of angles at the corner, which just makes a weaker point. I learnt this technique at a tailoring course, many years ago, and it’s worked for me! I’m going to demonstrate by using one of the cuffs made for the Olya Shirt. Please excuse my fluffy ironing board, and un-edited photos!
Once your seams are sewn, layer them by trimming the un-interfaced seam allowance down by half.
step 1
Using the point of the iron, press the seam allowance onto the interfaced piece, nudging and pushing but be careful not to stretch anything. Give it a good press. You should be able to see that you have some “bulging” on the interfaced side.
step 2
Now – you want to start with the side seams of the cuff, fold the seam allowance onto the interfaced side of the piece so that you just see the stitching line. It just needs to roll slightly up. Now press that, well.
step 3
Once both sides are done, fold about 3-5cm of the long edge in the same way, ensuring that you get the seam allowance of the already folded side tucked sharply into the fold. Press well again, especially on the corner where you’ll have more bulk. On really bulky fabrics like denim or coating, you will want to get the clapper (or hammer) out and reduce bulk. You could also shave some of the pile off fluffy coating fabrics, or cut the seam allowance at an angle, bevelling the edge.
step 4
Now, put your thumb into the cuff/collar, etc and place your forefinger on the outside, on the folded over corners, and pinch tightly.
step 5
Turn the fabric over the corner with your other hand, pushing with your forefinger into that corner to ensure as much of the fabric goes over as possible.
step 6
It’ll look something like this at this point, a bit rounded, not 100% sharp. Using a timber or plastic point turner, insert it into the cuff and gently push the corner, while pulling the fabric down to get the rest of the corner to pop out. BE GENTLE! And whatever you do, DON’T USE YOUR SCISSORS FOR THIS JOB! Seriously, unless you want to be redoing the entire thing because you’ve gone and poked a hole in the fabric, leave the scissors on the table! You might find the back of a seam ripper handy to encourage more reluctant fabrics to turn better, from the outside!
step 7
Now you can press the corner and edges again, using your fingers to manipulate the fabric.
step 8
I roll the under side slightly under so there’s no seam line showing.
step 9
completed cuff, this is the underside of the corner.
And that’s a 90 degree corner done! Believe it or not, the same method can be used for collars where the angle is more acute, but this time it will involve cutting some seam allowance away. So here’s the same thing, but for the collar of the Olya Shirt.
Same as above, sew seam, layer seam and press allowances onto the interfaced piece.
step 1
Press the side seams onto the interfaced side, then the long side, approx 3-4cm worth. This time you’ll see there’s folded seam allowance sticking out beyond the folded lines. Left like this there’s no way to get a sharp point.
step 2
We have to cut it off, but before you do, flip the piece over and check where the stitching line is, you do not want to be cutting “blind” and end up snipping the stitching! Cut just enough of the seam allowances so none extend past the pressed fold.
step 3
Turn in the same way as for the cuff and press well.
step 4
Completed collar corner!
And that’s it!! Your first few might be a little wobbly, but persevere with the technique, it really does work and is so much better than chopping a 45 degree angle off the corner. I’ve seen so many corners ruined with that technique as with wearing and washing the remaining tiny bit of fabric is weakened and turns to fluffy shreds. Good luck with your corners and edges!
P.S. if you’re using this for a pocket flap where you have a fold and a stitched side seam, just press the stitched seam onto the flap and hold it while you turn the corner. Works well for waistbands too!
Please click on the collage photos to see them much bigger and get more detail.