One more post squeezed into what’s left of 2018! I made these cropped trousers last month, but had to wait for assistance to get photos. I really need to make a plan with photographing trousers or dresses on my own. Anyway, the fabric is English wool suiting, with a textured herringbone stripe and a bit of colour that you really don’t read unless you’re up close and personal sewing it – or doing the ironing. It was a find from a charity shop!
Burda trousers 120 07/2018
I knew it would become a pair of cropped trousers, there wasn’t enough for a full length version. And I wasn’t keen on a skirt. I decided to use trousers 120 from Burda 7/2018 again. I like the slightly kicked out flare of the extension piece/ wide hem band(?). They also have a nice fit on my natural waist and are closer fitting around the hip area before becoming wider at the leg. I cut the pocket lining from a piece of navy and white cotton, but the rest is all wool. I like this fabric – it can go in the washing machine on a woollens cycle!
I’ve worn them a few times now, and I can say they’re really comfy to wear, are the perfect length and always get compliments! Today a little old lady told me I looked nautical”. I’ll take that. 🙂 Now, the only thing I can think of that might be missing from this pattern is a pocket on the bum. Such a handy thing to have, don’t you think? If you want to see the inners and a bit of construction, I posted a Work in Progress report on it that you can read here.
I’m hoping I’ll be able to get more photos of the other trousers I’ve been making and blog them soon!
We have had a real change in the weather this week! Suddenly the wind is coming from the North and winter is snapping at our heels. Thankfully I have a nice toasty warm new coat to wear – with a hood to keep that wind out of my ears. I shared the making of the coat in a couple of Work in Progress Wednesday posts at the beginning of the month here & here. Now here’s the finished article.
The pattern is “jacket” 110 from October 2018 Burda. I traced the 44 and added a 3cm FBA. In hindsight, I didn’t need to add that much and would definitely have been ok with just half of that. The fabric is camel/beige wool melton that is rather thick, and once seamed and enclosed, is very bulky! But, it is warm! The zip came out of the stash, and is also possibly a bit wider in the teeth area than a metal zip. This means that, although I laid the front band on the placement line, it’s not quite wide enough to finish at the right point on the other side. This means the snaps had to be reduced in size and the buttons don’t line up at the top. But I’m not taking that band off!! Far too much bulk.
The buttons on the front band are vintage military brass buttons. I had hoped to use these on the back band as well, but could only find two! So the front benefits from these and I used vintage leather buttons on the back band instead. Because you’ll never see the two together, I think I’ve got away with it.
The pockets are a great size, I used lining for the underside of the pocket flaps and for one side of the pocket bag, the other side is a scrap piece of cotton poplin Liberty fabric.
I am really glad I have this new coat, a more casual offering than my “old” coat. The pattern and instructions are pretty straightforward. If I make this again, there are a couple of things I’d change. My neck is too short (& my double chin doesn’t help) for the collar, so I’ll not be buttoning that shut. However, I usually wear a nice scarf in the winter, so that will fill the gap left by not zipping to the top. I will also revisit that FBA. I don’t need all that width afterall. The hood is great, nice and roomy, but it tends to slip a little too far forward. This means you could be in trouble when crossing roads if you aren’t looking properly! It just needs a little tightening up around the edges.
But I would like to make it again, in a less bulky fabric!
I’ve been holding on to this jacket for about a month now, waiting for the new owner to come and collect! And the fabric’s been hanging around even longer! If you’ve been following for a while, you’d have seen I started a Work in Progress Wednesday post, and the inner workings of this jacket were the very first of those! Now you get to see the finished article, worn by Daughter No 1. The pattern used is Moto Jacket 105 from September 2017.
Linton biker jacket
I am so glad that I used a different fabric on the inside of the cuffs, waistband, ollar and for the facings. Daughter No 1 likes to wear the jacket with the cuffs rolled up once, so you get to see the black fabric. It has a line of sparkle through it so it’s a little something different. I also love the silver zippers and snaps, they work brilliantly with the colours of the fabric. The lining is blue herringbone viscose, left over from a coat I made for myself around 10 years ago, I was really chuffed that there was enough to be able to use.
Contrast black welts to the zippered pockets
Large silver snaps
Daughter No 1 loves this jacket, it can be smart or casual, dressing an outfit up or down. I love using fabrics and patterns in this way. Here it’s worn with a boat neck Lark Tee and a pair of jeans, and it looks great! She wore this jacket with a white tee, black jeans and trainers to the Stitching Show last week, and the outfit was perfect. It will also look fabulous with the black crepe Pulmu Skirt I made her last year.
Coat update! Last time you saw it, it was all in pieces. I’d done the interfacing and needed to tailortack and then get cracking! So that was Thursday morning’s position. By the end of the day I had assembled the hood, the back, the sleeves and the two fronts with the welt buttonholes. I’d left the pockets to the last, because I knew it would be fiddly because of the bulk of the fabric. Actually, they were fine, and the rest went together really well.
Hood, collar pieces and facings sewn, no side seams!Welt pockets. On the left you can see the bits of interfacing on the fronts, and the cut down dart to reduce bulk.
On the weekend I attached the zipper to the centre front and made up the collar, attached the hood and facings. I attached the zipper before I sewed the shoulder and side seams, figuring that it would be far easier to do with less fabric and fewer pattern pieces flapping about. I also attached the collar and hood pieces before sewing the side seams. If fact, I didn’t sew the side seams until I’d finished all the faffy, bulky work on the front. It was tricky enough to do flat, I can only imagine how frustrating it would have been had the sides been attached.
The front
Things got really tricky with the front tab and collar, there were so many layers of wool that it was tricky to get it all in under the foot of the machine. This is one of the times when I am very happy to have a sewing machine that weighs so much! I really don’t think I’d have been able to manage with a modern, lightweight machine. Then adding the front fastening band made more bulk and made things worse.
I am unhappy with the position of that piece, I couldn’t get it higher as the machine pushed it down every time I forced it under the foot, even when I basted it in place. It also seems to be too far from the centre front, and I think that’s because of the width of the zipper. I really should have attached the band closer to the front. Monday wasn’t a great sewing day, I had a re-occurence of my nasty headaches and attempted to work through it. It wasn’t one of my best ideas, and I had no relief the next day either. So now I have a pretty much finished coat, but I’m unhappy with that band and know it will be a mission to move it. So I’m inclined to leave it. But I know it’s not right. Grrr
Left, sleeve head tipped over; top right, pinning the sleeve in the seamline; bottom right, sewing the sleeve into the armhole, sleeve side up.
In contrast, the sleeves went in so easily! If you’re making a jacket or coat, run a line of long gathering stitches 2cm from the edge of the fabric, just one line, and pull that up slightly, to give you the shape of the sleeve head. Then pin it into the armhole with the armhole folded back, and the sleeve over it. Next, pin on the stitching line, parallel to the stitching line, easing the fullness into the sleeve head. It’s fiddly and the pins bite, but it gives a great finish. Then you sew the seam from the inside, the sleeve side up, picking out the pins as you get to them and using both hands and almost all your fingers to smooth out the fulness and avoid puckering. Once you’re happy with it and the hang is good, sew in the sleeve padding. This can be purpose made wadding or you could cut bias strips of your fabric and fold in half longways. Stitch just before the original sleeve seam and fold it over and into the sleeve head. Some jackets need this step, some don’t, it all depends on the look you’re after.
Looking up at the shoulder pad on the left, into the armhole with the interfacing and padding showing.
The lining is in, and the hem handstitched in place. The lining is from The Lining Company. It’s an acetate/viscose twill, and it’s shot, so you get a lovely shade of colour, depending on the direction in which you view it, and which side you use! I chose the Light Blue Fawn colour, which looks fabulous with the colour of the wool. I’m using the blue-er side but have decided to use the other side which has more of a gold tone to cover the snaps for the front. I was hoping to find a brass/bronze colour snap in the time I had, but I couldn’t. So simple silver snaps are now covered with the lining.
Lining details
I had originally intended to finish the coat to wear to the Knitting and Stitching Show in London tomorrow, but the weather is not showing me I’ll be needing it, and I haven’t got the fastening band buttonholes done yet either. I guess that although my headaches have finally passed, I’m not in quite the right place to finish today. I’ll get it done over the weekend, and hopefully some proper photos will follow soon! In the meantime, I’m looking forward to my first visit to a big London sewing show!
From the back
I’ll show you what I buy over the weekend, all the fabric I bought at the NEC earlier this year has now been made up, so I’m kinda justified in getting a bit more! 😉 And I would love to find the perfect fabric to make up another dress, The Assembly Line’s V-Neck Dress.
Not your usual WIP today, because today is about tracing and toiling and fitting. I had a list of new patterns to trace for the girls, one pair of trousers, a blouse, sweatshirt, mini skirt, coat and sleeveless top. I’ve got them all traced from their Burda magazines and decided to start with toiling the trousers and the coat first. The coat is on both girls’ lists, and I’ve been wanting to make it since I saw it in the February Burda last year!
A whole lot of tracing!
The trousers are 101 from December 2017. Daughter No2 fell for the shape and the ruffle on the hem. The fabric chosen to make them up is from the stash, some dark stretch denim left over from a pair of Birkin Flares that I made for myself. I traced the 36 & 38 and toiled the 36, graded to the 38 over the hip. When the toile was tried on though, it wasn’t necessary, so I pinned it out and adjusted the pattern accordingly.
What we did need to do though was add pockets!! You need pockets, just like ladies love them in their dresses, we love them in trousers! So I drew an outline of where it would need to be directly on the toile while daughter no2 was still in them. She decided the angle, width and depth of the pocket and I drew around her hand.
side and rear views
The other adjustment I needed to make was to take a horizontal dart out of the trousers below the bum.
Narrow dart in the back leg to remove some wrinkling and sagging
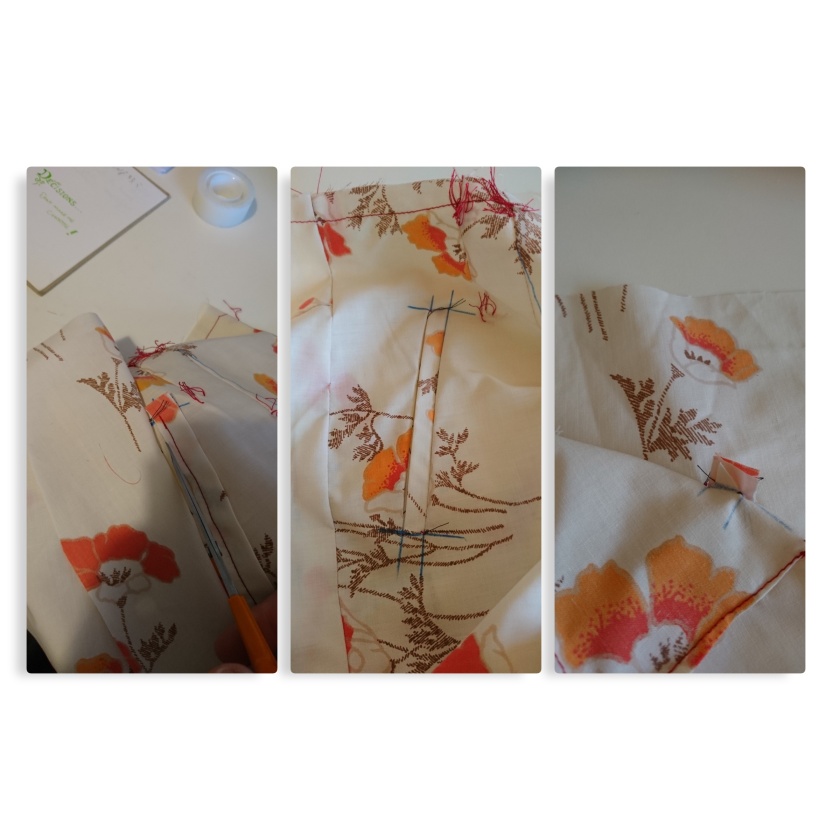
The pockets are welt pockets on a slight angle. The welt is 1cm finished depth, the pocket opening is 12.5cm. The pocket lining will be cut from a thinner, cotton fabric while the bag will be from the denim, so you only see denim when the pocket is opened. I rather like this sort of pocket in trousers, it’s nice and neat.
So if you’re worried about welt pockets, here’s how I made these, after the trouser toile was already fully constructed, which is not really ideal!
Attach welt, 5mm seam allowance.
Pin pocket bag right side down to attachment line.
Sew exactly on the line, start and stop exactly in the corners.
Cut through the pants halfway between each sewing line, cutting triangles at the ends and ensuring to snip to, but not through, the stitching.
Turn pocket bag to the inside and press well, turn welt up and press seam allowance well.
Ensure the triangles are pushed to the inside as well.
Pin the pocket lining to the welt seam allowance.
Stitch from the trouser side so you can see your original stitch line and stitch on that line or only just off it.
Press well and close the pocket, either with pins or basting stitch.
Pin the pocket lining to the bag.
Stitch along stitch line.
Moving the trouser piece out of the way to reveal the triangles, welt and pocket pieces below, stitch across the triangle and secure well.
Sitch the pocket pieces together around the edge, ensure you secure the lower triangle and welt in the seam.
Pin the top and sides of the pocket to the top and sideseams of the trouser pieces.
Remove the pins and admire your new pocket!
I know a lot of people are scared of welt pockets, mostly because you have to cut through your fabric, and what if you’ve made a mistake!? The thing with these pockets is to be precise and careful. Make sure you mark very carefully the placement and or attachment lines onto the fabrics, using whichever method you prefer. The critical thing that I learnt was to be exact on the start and stop points, you have to mark those very clearly. It also helps to baste everything instead of relying on pins, because the fabric will still move. But they’re do-able! Practise on scrap fabrics until you’re more confident with your methods, but don’t avoid them, they look great!
Now I’m off to toile more patterns. I might even squeeze in another project for myself before the end of the month. I fancy a new shirt.
I know you’re expecting to be seeing my nice new dress today, but instead of sewing this weekend, I decided to spend the time with my girls. The dress will come, but first, here’s a project I finished last week.
Chippping away at the long list Daughter No2 has left for me to make up, I decided to make a couple of the tops this month. The pattern is 106A from the February issue of BurdaStyle, 2017. The fabric chosen is a lovely warm grey polyester something or other left over from her 6th Form Leavers Ball dress. It has a lovely drape and weight, but one massive disadvantage. It will not be ironed. If you were to make it hot enough to press, you’d melt the fabric. So – fun with flounces in a poly fabric that won’t iron flat….
Burda Top 106A February 2017
Luckily I didn’t have to fight for space to put the pieces on the left over fabric, there was a decent size piece without awkward bits. I had decided that all the insides would be French seamed to keep it all nice and neat. One thing to be carefull of when you make this top, the neck facing isn’t attached until you’re finished faffing with the flounce, so it’s easy to stretch that v out. Make sure you stabilise it before you start sewing anything else, otherwise you’ll be cursing…
The flounce is hemmed before you attach it to the body, and it goes on in sections. I have to add that I was really greatful that it was the pattern with illustrated instructions in this issue, I don’t think I’d have got the placement of the flounce right without it! Once the flounce has been attached, the facings go in and the side seams sewn. Then you’re pretty much on the home stretch.
I used every pin in my pincushion to keep that flounce hem in place and decided to hand stitch it in place because I didn’t want the curve to stretch out. So it all took a while to finish. Because I hand stitched the armhole bias binding too – of course!
I love how the flounce drops, the box pleat in the centre front gives great shape and the length is just perfect. Daughter No2 came home this weekend and was really looking forward to trying on her new clothes! This top looks great on her, the colour (as we already knew) suits her and, being grey, goes with just about everything.
But will I make another? I’m in no particular hurry…
Leaving you with a pic of my two monsters. All growed up.
I’m a bit behind on my blogging, I have two dresses and a pair of trousers completed, and a top almost there! But neither have been shown off yet….
Burda trousers 139 04/2011
I’ll start with the trousers. Looking through 8 years of Burda magazines for April, I found a lot of patterns I’d wanted to make way back then, but obviously never got round to. One of them is this pattern. It’s 139 from April 2011, in the plus size section. I traced the 44 and reduced the leg length by 4cm, remembering that the last time I lopped off 6cm that it was a trifle too much. I didn’t bother to toile, as the waistband is elasticated and there’ll be more than enough room (I know, not normally something I would go for).
The reason why I wanted to make these was purely because of the width of the leg and the detail at the hem, it’s nice to have something a little different. In hindsight, regarding the length, I should have gone the whole hog and chopped off 6cm. If I’m wearing these trousers with trainers or sandals with “platforms” or a wedge sole, I’m fine, but around the house in my bare feet they are too long and I keep standing on the buttons and elastic in the hem bands!
A post shared by Anne W (@compulsive_seamstress) on
The fabric I chose is the first of the pieces I got at the NEC to be used. I had hoped to start of that lot earlier, but never mind. As long as none of it lasts passed the summer, I’ll be happy. It’s not allowed to enter the stash! It’s a navy and white washed cotton and linen blend, and I cannot remember which stall it came from. I had 2m and it was just enough for this pattern with the width of the leg pieces, and the length… If I’d taken out those other 2 cm it would have been a more comfortable fit on the fabric, but no worries, it all worked out.
There are in seam pockets in the side seams, that fabulous pleated detail at the hem and a wide grown-on elastic waistband. I have to admit that these are super comfy, I have worn them three times already and only today managed to get blog photos! The linen is soft and floppy, just what I like. Please excuse the creases, I hadn’t got round to getting photos before we went out, so I’ve done a lot of sitting…
Putting them together was without incident, but keep an eye on the line drawing when it comes to asembling the hem bands and sewing on the buttons etc. The only thing I’d change is the elastic inthe hem bands. I can’t really figure out why it’s in there as the tab isn’t short enough to pull it up. I shortened the elastic in my hem bands so that there would be resistance and there would be gathering in the band when the tab was pulled to the end button.
I really like these trousers, and I can see another being made in the not too distant future. That’s another project done for April BurdaChallenge2018, I’m working on some Japanese inspired stuff this week, haven’t even looked at the May magazines yet!!
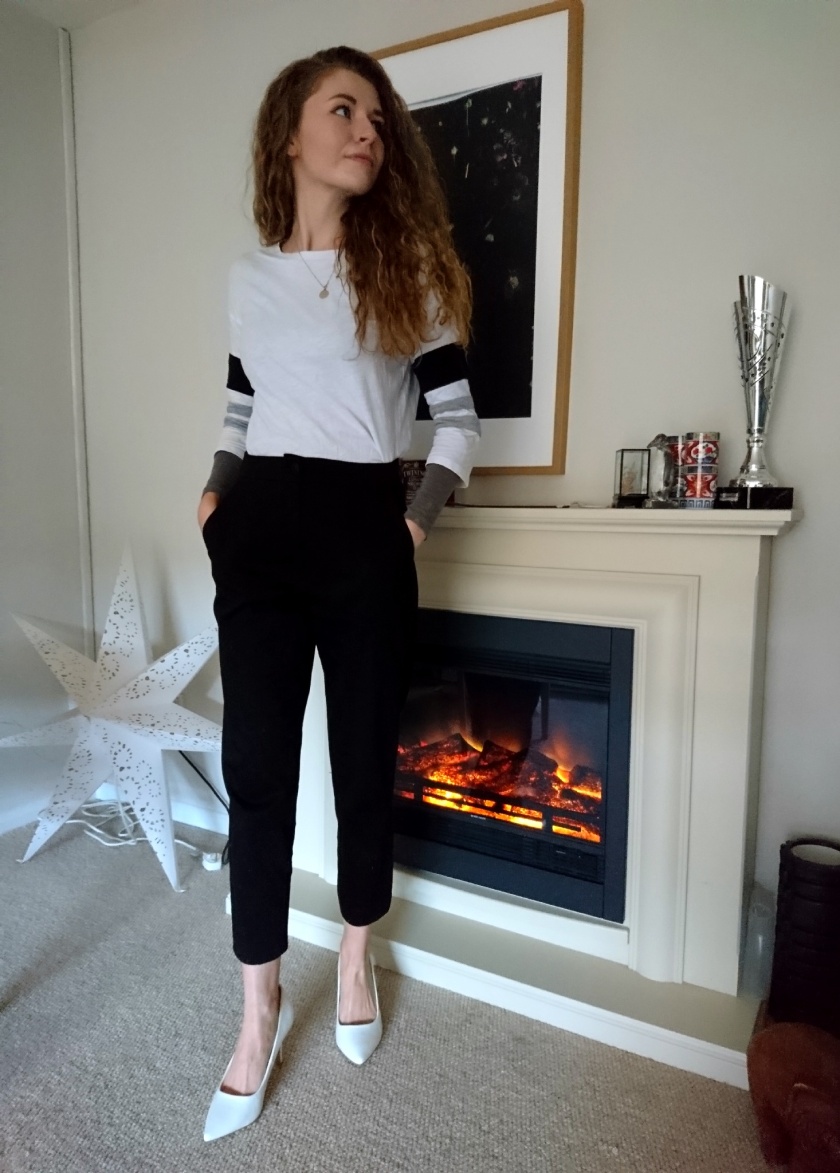
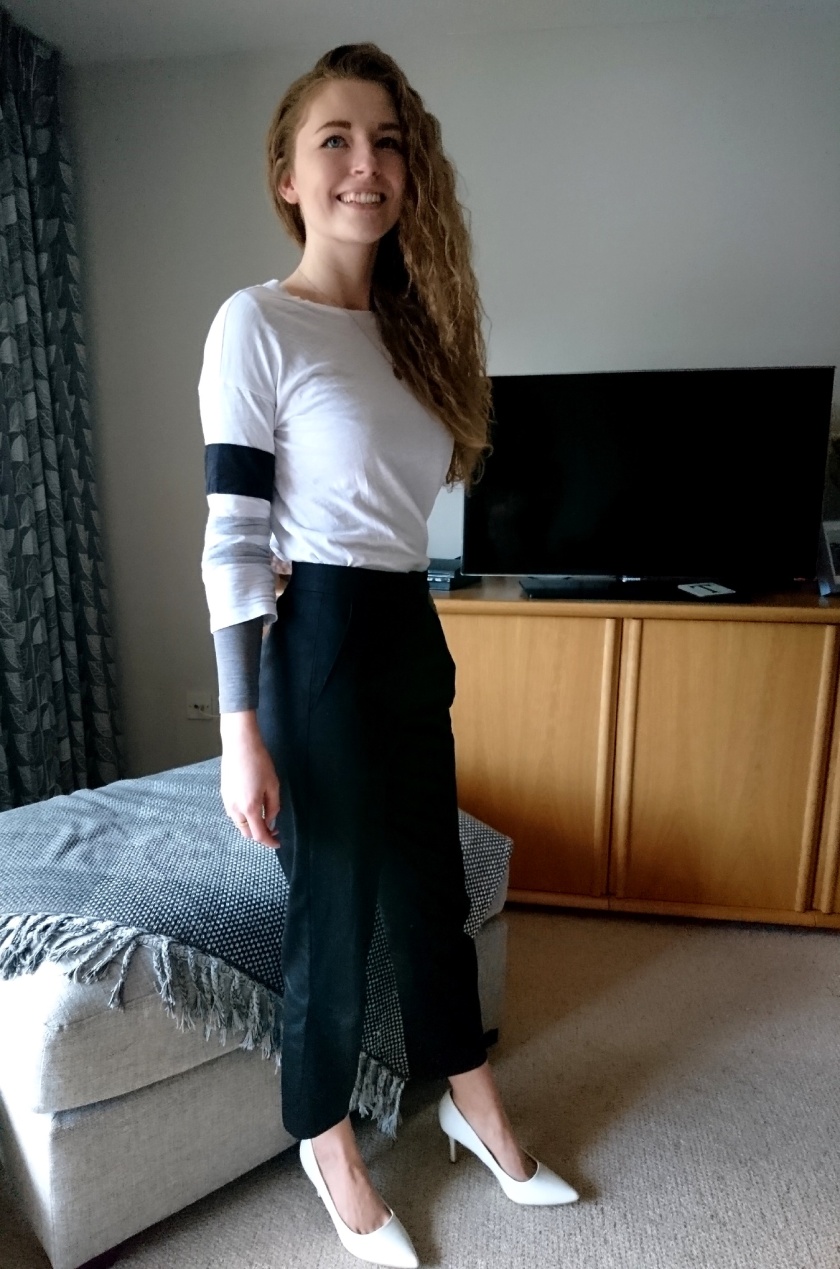
Here’s a pair of trousers that should have been made about a year and a half ago – at least! The fabric is black stretch cotton sateen, bought from Croft Mill Fabrics for Daughter No 1 for trousers. But she asked me to wait to make them, considering the weight of the fabric to be summer-worthy only, and it must have been Autumn when the fabric was purchased.
Trousers 123 06/2011
I’d always intended to make another pair of trousers 123 6/2011. I’ve lost count of how many times I’ve used this pattern – for both girls! It’s a petite pattern, so needs to be lengthened for Daughter No 2, but is pretty good for her sister. I shortened the waistband depth by 1.5cm this time though, she always complains it’s too high. I think it’s because she’s short-wasited that it “gets in the way”.
As we were going to visit over the Easter weekend, I figured it was time to get that fabric out of my stash and the “to do” off my list! She’s been living about 2 hours away for the last year, and that isn’t terribly convenient for sewing and fitting.
I made one other adjustment – the back waistband (which is supposed to be straight) has a dart folded into it, lining up with the centre of the two back darts on the trouser pieces. This is because the wasitband always gapes in this pattern, but the folding of a paper dart does the trick. I cut the 17 (34) and sewed it up. There are no contrasting fabrics in the pockets, zip guard or waistband, it was kept deliberately simple. I do think I could make the trouser legs narrower, she’s so slim that even the smallest size needs taking in!
She starts a new job in London this week, so I hope these pants will be getting loads of use! They’re perfect for dressing up or down and look great with heels and a nice pair of trainers. I was glad to be making for her again, it’s been a while. And secretly, I’m chuffed to bits that the old pattern adjustments still worked and I didn’t need to take the pants home again to tweak the fit!
So another pattern to tick off for the BurdaChallenge 2018, even though it’s not a March pattern, and more stashbusting, making room for new stuff! 🙂